Build a Simple Water Rocket Launcher

This is the text (word) file that explains the video, Water Rocket Launcher : Simple and Easy.

Note : There is an Update on drill size to use for the valve.


The instructional video is divided into 12 video clips, and those clips are embedded below. You can watch a clip and read the description that follows.

01 The numbers correspond to the numbers at the top of the video.

02 Many of the best sciencetoymaker projects evolve from complicated at first, to simpler. So what happens when we apply simple to the do-it-yourself water rocket launcher? I think this simpler design is safer, more fun and easier to build, costing almost nothing, and it’s quite portable.

Water Rocket Overview

03 With this deign we just hold the bottle on as someone pressurizes it with a bicycle pump, and let go—no complicated trigger mechanism. I think this is safer because you cannot get to the really high pressures. It starts to leak before that. Older kids can hold it on to higher pressures, but they should be able to use it safely. I know that older/stronger/smarter does not correlate sometimes, so don’t let knuckleheads use this water rocket launcher.

The long pipe keeps the water rocket bottle above young kid’s heads so it doesn’t hit them on the way up. I came up with this idea after witnessing young kids run toward an old, low-launching bottles during countdown. Some people have “improved” my previous design by making the launcher self-supporting and launching close to the ground. But knowing how young children are impulsive, I can’t imagine why anyone would launch from low to the ground.

I do, however, understand why people love to be near the launch on a hot day: it’s a splash of cooling joy! I think it’s more fun when you are actively holding the bottle on than it is passively watching from a distance.

The Music

04 I’m fortunate to have a world-class Celtic group—Burning Bridget Cleary--in my home state of Pennsylvania and they were kind enough to allow me to use a high energy song I really like. You’ll have to go to their website for an explanation of the group’s name. I know it’s a little incongruous to have such beautiful music accompanying the messy process of building a science project. You can see a video with this music (Stor Mo Chori). You can support great artists by buying their quality music.

Water Rockets as Learning Tools

05 Tactile, hands-on learners can feel the pressure build as air gets compressed into the bottle . They can also feel the air get warmer as the pressure increase (Boyle’s Law of Gases: when volume goes down and pressure goes up, the gas heats up). If you let the hot air cool, then when you release the pressure the air will be colder than the surrounding air. That’s the principle that makes refrigerators work. And if you pull the bottle off suddenly it looks like smoke, but it’s really water vapor: fog caused by the lower pressure and cooling.

Obviously water rockets use all of Newton’s 3 Laws of Motion.

I’m too lazy to do much with finned rockets, but it’s very easy to launch water balloons with water rockets. Water balloons are dense enough that you can use the amount of time it’s in the air to figure out the gravitational acceleration and know how high it went, what its velocity was when it hit the ground, etc.

Build a Simple Water Rocket Launcher: Pipe Basics First

Update Note: The purpose of the video was to see how simple we could go. Although it is possible to make the air inlet from a pen body or needle attachment glued in with hot glue (as is seen in the video), time has shown those options to be not as durable as a tire valve inserted into an end cap--the original way of doing it. You can see how to do this here . However, I now suggest that you use a slightly larger drill bit: 9/16" (instead of 1/2") because it will be easier to pull the valve into place. 9/16" is not so common in twist drill sets, but the flat kind of drill bit called "spade bits" or "speed bits" are inexpensive even when bigger than 1/2" and they work well.

06 The heart of the water rocket launcher is a very inexpensive piece of plastic (called PVC for polyvinylchloride—not CPVC which is more expensive and sized differently) water pipe. It costs around 2 dollars in U.S., and that’s enough pipe to make 2 launchers. I use a 5 foot long (about 1 1/2 meters) piece for each launcher. The store can cut it for you.
The diameter of the pipe in North America is called ½ inch (half inch), but it’s not really half inch if you measure it (the inside diameter is actually about 5/8” and the outside diameter is about 13/16”—weird)!. But at the hardware /building supply store you should ask/look for HALF INCH PVC PIPE. “Schedule 40” refers to the thickness of the pipe wall and schedule 40 by far the most commonly found. Although you might be able to find thinner wall pipe, I like having the additional strength that schedule 40 provides as people hold the bottle on.
Where the metric system is dominant, look for plastic pipe with an outside diameter of about 21mm. Or just take a two-litre bottle to the store with you and look for a pipe that barely fits into the bottle. Keith, a physics teacher in England told me that the commonly available 22mm pipe at DIY chains like B & Q is too tight a fit on the bottle. He sanded (abraded) down the outside until the 2-litre bottle neck would slide smoothly over.

A First Look at the Build

07 This might seem like a lot, but once you’ve built one and know what to do, additional ones will only take you 15 minutes to build. When you have the pipe, there are 3 important places.

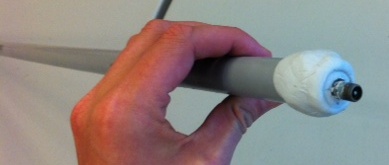
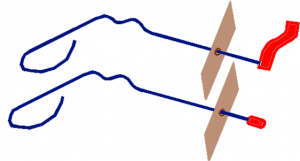
  • 08 Near the top of the pipe where the bottle seals against the pipe. It’s quite easy to melt the pipe with a candle and form a little bump that seals on the pinch.
  • 09 Near the bottom of the pipe there is an entry for air from the bicycle pump, to go into the pipe and into the bottle. Abhinav Subramanian in Texas discovered that the outside of an old ball point pen, which fits the chuck of the bicycle pump, works well. It’s held in with hot glue or epoxy. A drill is convenient for making the hole, but not necessary; there’s a workaround. You can also use an inflator needle (normally used to inflate soccer balls, volleyballs, etc.). However, I have found that inflator needles are more prone to leaking.
  • 10 The bottom end of the pipe must be sealed off so no pressure escapes, not difficult. We melt it and close it off. Some glue makes the seal.
    UPDATE: You might be able to combine 09 and 10 (air inlet and close off bottom) into one step. See "Step B" below.

Step A: Form the Bottle Seal, Near the Top

Many water rockets use O rings to stop any leaks between the bottle and the pipe. I prefer this simpler method that grew out of my experience in the South Asian country of Bangladesh. I lived and worked there for a year and a half and watched people drill water wells. They thought nothing of heating plastic pipe and shaping it however they wanted it. Then, from this documentary about building a wooden water tub (one of my favorite films)  I learned how a taper can pinch in a way so as to make a seal.

11 At the top of the pipe, mark where the pipe goes into the bottle but does not touch the bottom inside the bottle. The part of the pipe inside the bottle keeps it going straight as it launches.

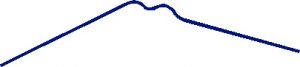
12 Heat up a narrow section of the pipe with a candle-- always turning for even heating all around. Keep the pipe at least 2 inches or 5 cm above the flame. 13 If the flame sways then shield it. Never let the pipe burn. Burning PVC gives off particularly toxic smoke. Be patient; it can take a couple of minutes. 14 When you can bend it like this, heat another 15 several seconds or so until it bends easily. 16Then push the top of the pipe down. That will cause the soft part to bulge out a little. If you push pretty hard it will stay bulged out.

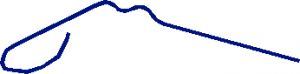
I prefer a subtle bulge. It’s easier to keep the bottle from leaking. 17There might be one circumstance where it would be best to make a big bulge like this: If only young children will be pumping the bicycle pump, then they won’t be able to attain much pressure. Without much pressure the bottle might be wedged on tight enough that it won’t come off when released. A big bulge—which you can make by pushing the pipe down harder and holding on until it cools, might let go of bottles a little easier.

When you’ve made the bulge, let it cool, and then test with a bottle. The bottle should stop when it hits the bulge.

Step B: Add an Inlet for Compressed Air (Bicycle Pump), Near the Bottom

Update: An even simpler method that combines air input with closing off the bottom?

Here's an interesting tip from James Upham in Canada, sent after the video was finished. "I think I’ve come up with an even simpler way to build the launcher. Rather than spending time closing off the lower portion of the PVC tube, and cutting into the side of the tube to insert the air valve, we just wrapped some epoxy putty around the valve and stuck it into the bottom of the tube. The putty sets up in about 5 minutes, and it takes no time at all to stuff it in around the valve so it forms a good strong seal."
A good simplification, and I'll add a couple of thoughts. First, the epoxy putty plug will bond stronger if you scuff inside and outside of the smooth PVC pipe with sandpaper. I have visions of the plug popping out and turning the whole launcher into a water rocket! Second, in the rare event that your air pump has a leaky check valve (one-way valve to keep compressed air from going back into the pump), then water--from when you put the bottle on, that settles at the bottom) could leak into the pump. I've only seen this happen a few times, but you'll know it's happening if it suddenly gets really difficult to pump. Usually you can deal with it by pumping faster.

18 The simplest way to make an air inlet is to first find an old pen that fits snugly into a bicycle chuck (if the chuck is threaded like a screw, then you’ll have to use the needle inflator, below. 19 Remove the ends. 20 If it is soft, you can often cut it with a good pair of scissors.

The air inlet should be at least 15 centimeters or 6 inches from the end (bottom) of the pipe. This raised inlet lets some water collect in the bottom before submersing the air inlet. That could be a problem if the check valve (one-way valve) in your bicycle pump doesn’t work well; water could back up into the pump. If you have a drill, make a hole just big enough to get the pen through, with a snug fit.

21 If you don’t have a drill, hammer a nail in, pull it out, and then heat the area close to the nail hole. Hold the pipe at least 5 cm or 2” above the flame and keep the pipe moving a little. Do not burn the plastic pipe. 22 When it is softened, push the point of scissors in and enlarge the hole. 23 Before the plastic cools, push the pen in. Let it cool and harden.

For gluing, I find that hot glue is easy and is ready to use quickly, but it seems hot glue guns are hard to find in some places in the world. So you can substitute epoxy, which is stronger than hot glue but which can also be hard to find. So, I think any waterproof glue could work. Super glue type of adhesive might not be thick enough to fill up gaps, but you can experiment.

Making the Glue Connection Stronger

I am still experimenting with how to glue the pen tube in. 24 At first I just put some glue on the outside. 25 It worked for a while, but then broke loose. 26 I had forgotten to scratch and scuff the plastic before gluing. Glue cannot hold onto smooth plastic very well, but scratches make for a much stronger connection. You can use sandpaper or rough concrete or stone to make the scratches.

Other strategies can also make stronger glue joint. 27 I got a lot of glue inside the pipe first, pointing up and around so the glue settles on the pipe around the hole. 28 Don’t do what you see here, but if you cut away the other side of the pipe, this is what you’d see. 29 With the pump chuck on the pen, I push it in and (important!) push some air through while the glue is still soft. This keeps the glue from obstructing the tube, which would defeat the whole purpose for putting it in. Putting glue inside like this always works for me, keeping the pen from breaking loose and no leaks. If you think about it you’ll see that the air pressure inside the pipe pushes the glue even tighter against the pipe, which is good—it tends to close leaks. However, if the air reaches the glue outside, the air pressure pushes it between the glue and pipe, which opens up leaks rather than closing them.

30 Other things you can try: making a collar or harness of glue to keep the pen affixed. 31 I have also experimented with pushing glue into the pen after the outside glue is hard. If the other end of the pen tube is near the far side (inside) the pipe, it glues it there, increasing strength and eliminating wiggling. 32 Once again it’s important to blow air through before the glue hardens to so there are no obstructions.

Using an Inflator Needle for the Air Instead

33 I seem to get small leaks when using sports balls inflator needles instead of pen tubes. I think it is because the needle is so thin that the glue doesn’t hold it well. If you are careful, however, it works ok. I suggest using really strong glue, like epoxy. 34 I do not think it’s a good idea for it to be sticking out very much—especially with soft glue like hot glue—because it wiggles around a lot. Does anybody have good techniques for getting inflator needles to work as well as pens?

Step C: Close Off the Bottom

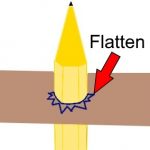
If you’ve done the other steps, this is pretty easy. 35 Heat the end of the pipe until it is soft enough to be crushed with a pair of pliers. 36 Squeeze glue around the inside of the pipe. This is because even though you will crush the end of the pipe shut, air can still leak out. But the glue on the inside stops the leaks.

37 At first when you crush the end it opens up again. But as the pipe cools it stays shut.

Optional: Launch Water Balloons

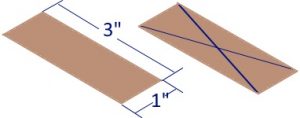
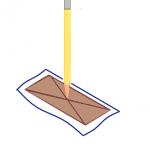
This is very easy. 38 Cut off the bottom of a soda bottle. 2 liter bottles work better than smaller, I think because of Newton’s Second Law of Motion with more mass being hurled in the opposite direction. 39 Tape it to the bottom of an uncut bottle with duct tape. 40 Tape the cut edge so it’s not so sharp. 41 Put water balloons in the top of this special rocket. Again, as per Newton’s Second Law of Motion, smaller water balloons will accelerate faster and go higher than bigger.

Launching

You can launch bottle without any water. It makes a satisfying sonic shockwave when it goes off. The bottles still go pretty high, if not as high, and that might be the way to go if it is cold and you don’t want to get wet.

If you do fill the bottles with water, if more than 1/3 full then you are reaching the point of diminishing returns. Certainly the bottles should not be more than ½ full because you need some space for the compressed air. Although you only fill the bottle with water, not the piple, of course some water will go into the pipe when you put the bottle on. That's usually ok. If, however, the check valve (one way valve that let's air out of the pump but does not allow air to be pushed back in) is leaky, there could be a problem. If water collects past the level of the air inlet, and if the water gets pushed into the pump, it gets difficult to pump. The solution is simple. Every few launches, just tip the pipe to drain the water out.

Have Fun, Be Safe

Even though it’s hard to hold onto a bottle long enough to build too much pressure, like a baseball, if it hit someone directly it could hurt or even kill someone. If you think about it, unlike a thrown or hit baseball which is just the energy of muscle contractions once, with each stroke of the air pump you are adding more and more energy. An adult needs to supervise kids.

42 I’ve only seen what happen in this clip this one time. My son let the rocket go up but was still holding onto it. So it broke loose from his grip in a deflected spin that could have bad results. It was his first launch and I think the lesson is to show people how to get their hands clear when launching!

43 I already mentioned that if a young kid is pumping, he might not generate enough pressure to get a wedged-on bottle to c come off. Pushing the bottle off with a hand is ok as long as it does not have too much water (the low pressure might not get all the water out by the time it comes down, making it heavier if it lands on a little kid’s head.

In this clip the bottle did not go off and, since nobody was holding it anymore, if fell over, and that dislodged it. As long as it’s sliding on the ground and has low pressure, I’m not too worried about it. It would be worse if someone caught it before it hit the ground, and that launched it, hitting someone pointblank.

44 If you have a cluster of kids it will never fall over. Holding onto the bottle though the launch is harmless if you really have a grip. But if it gets loose while it still has pressure it would be dangerous.

I am a bit wary of putting fins on water rockets. Yes, they go very high instead of tumbling, but they also slam back to earth fast enough to do some damage. Recovery devices like parachutes for water rockets are notoriously unreliable. However, my friend Thomas Buchwald, a teacher in Germany, told me about “backslider rockets” and he made some with his students. These finned water rockets go straight up, but seem to tilt to the side and almost glide on the way down. You can see Thomas’ students launching here  and an explanation of backsliders here.  and here

If you want to add a pull-string trigger launch you can see the original trigger-launch design starting here. Links to all parts here.

How to Make a Working Model Robot Hand

Note: if you look through the instructions below and decide the project is too messy or complicated, there are two good alternative builds.

First, a brilliant use of "zip ties" for both pulling and spring-back from Curt Gabrielson.

And Joel Anderson sent me this link for a simple animatronic hand.

Important Revision

We've figured out a simpler way to make the back of the hand.

Pattern

You will need a pattern for the hand which you can print out. When you print it out, be sure that image is not scaled bigger or smaller. Do not leave any boxes checked that say "fit to page" or anything like that. Also, measure the scale check; it should be 2 inches or 5 cm.      PDF   

Introduction

Part 1 is and introduction, starting with a science road show to an elementary school where we get kids to start thinking about how their hands work. We make the case that the muscles that move our fingers are not in our fingers! Our fingers are so strong and yet so nimble because strings--called tendons--connect parts of our fingers to big muscles in our forearms. If YouTube is blocked in your school, try this Schooltube link Part 1.

Directions, Materials, Back of the Hand

Note
This method of embedding the strings on the back of the hand is outdated. Please watch the revised version above.

Part 2 actually starts the directions, beginning with a list of all the materials you'll need, then shows how to embed the strings in the silicone on the back of the hand. (See "Important Revision" above for the better method) You can print out the pattern for the hand in PDF format. When you print it out, be sure that image is not scaled bigger or smaller. Do not leave any boxes checked that say "fit to page" or anything like that. Also, measure the scale check; it should be 2 inches or 5 cm. If YouTube is blocked in your school, try this Schooltube link Part 2.

Front of the Hand

Part 3 starts after the silicone on the back is cured, about a day. Then, on the front of the hand you anchor 5 straws in silicone and weave a thin bead of silicone over them. If YouTube is blocked in your school, try this SchoolTube link Part 3

Finishing

Part 4, the final part, is about cutting notches in the fingers to allow bending in 3 places in each finger. Then you thread the strings through the straws, and congratulations! You have made a working model hand with your own hands! And I bet you'll never forget how your hands work If YouTube is blocked in your school try this SchoolTube link Part 4

How to Make a Putt Putt /Pop Pop Boat

Follow directions exactly when making your first engine!

And don't do anything not in the instructions.  Trust me that there are reasons for all the finicky details. --Slater, the sciencetoymaker

Read "Before You Start Building a Putt Putt Boat" First

If you haven't yet, first watch  how to follow the steps in the instructional videos. (Part 2 at 3:29). 

All instructions are in video form. 

Below are the video links and descriptions to making the kind of toy steam engine boat seen in the movie Ponyo. You can go straight to the instructional video play list, if you want.

Patterns and Material List

Introduction: Putt Putt Boat introduction in two parts

Part 1 Introduction to pop pop (aka putt putt) boats.

Part 1 shows my students testing their boats and gives an overview of the steps involved in making the engine out an aluminum beverage can. I relate where I first encountered pop pops (in South Asia in the 1980's). Then on to a little history: of steam power in general and putt putt boats specifically. Next I show some commercial boats I bought.

Part 2 continues the introduction.

I start off relating my efforts to create an easy enough for my students to make, inexpensive steam engine that used common materials that could be found anywhere. Then I make my plea that people follow the directions carefully for the first engine, then experiment.

Materials and Tools (video Part 3): Materials and Tools for a Putt Putt Boat

Part 3 goes through all the materials you will need.

Here is a complete list of materials and tools.               Materials and Tools

Note that if you would rather use an oil lamp instead of a candle, excellent oil lamp instructions are here.

Build the Boiler

Step 1  (Video Part 4): Cut off Can Top

Part 4 is Step 1 of the actual building instructions. Are you confused enough? Sorry! The steps are small. This Step 1 is just cutting off the top of an aluminum beverage can.

Step 2 (Video Part 5): Cut and Trim Can Middle

Cut and trim the middle part of the can so you have a sheet of aluminum to build the engine with.

Step 3 (Video Part 6): Fold Aluminum Sheet in Half

Fold the aluminum sheet in half, with a thin sliver of the inside of the can showing so it's easier to separate in a later step.

Step 4 (Video Part 7): Scale Check. tape Pattern on

Print out the pattern to actual size (no fitting to page or scaling) and check the scale of the pattern to be sure. Then you tape the pattern onto the aluminum sheet. Save the other boiler pattern and that other weird-looking pattern called the bend pattern.         Boiler and Bend Pattern

Step 5 (Video Part 8): Cut Solid Line, Write Name

Cutout the pattern and aluminum on the solid lines--carefully. Save one of the aluminum strips for a later step. Oops, I noticed that the pattern here doesn't have the writing--that's ok, same pattern.

Step 6 (Video Part 9): Fold Dashed Lines, Sharp Corner

Find a sharp corner, line up the dashed lines with the corner, and make clear fold lines on the dashed lines of the pattern. Your thumbs should be together, and press really hard so you see clear fold lines.

Step 7 (Video Part 10): Fold Edges All the Way, Flatten

Taking all the pattern/tape off and accurately fold the edge flaps the rest of the way over with a credit card or something like it. Then you need to pound it (not rub it) flat. Be careful not to kink it.

Step 8 (Video Part 11): Straw Parts Names, Open, Long end of Straws in

Use a thumbnail to open up the end of the "pocket" a bit, then pinch the end of the long part of a flexible straw and push it in. Then the long part of another straw. Push all the way in, but not so hard them split the other end.

Step 9 (Video Part 12): Small End Straw in, Tape Card

Put one more straw in to form a curved dome top, but this time it's the short end of of a straw. Pinch it and push it in--on the side with the flaps--only to the bendy part. Then put tape donuts on the flat side without the flaps and tape it to a piece of cardboard. Gently push on the edges to make the bottom flat.

Step 10 (Video Part 13): Mix, Apply, Push in Glue

Actually glue the aluminum so it keeps its new shape. You should watch the whole step before starting because you only have 5 minutes once you mix the two parts together (less if it's hot). You should have equal parts and mix thoroughly. Dab it on the silver parts even where the silver disappears, especially the ends. It's really important to push the epoxy in between the folds of aluminum with the strip, for strength and to prevent leaks. GOOD NEWS NOT IN THE VIDEO YET: Sticky epoxy is easy to get off with VINIGAR.

Intake/Exhaust pipe

Step 11 (Video Part 14): Measure, Cut Glue in Straws

Measure 1 1/2" or 39mm from the end of the bendy part of the straws into the small part of the straw. Cut there and apply mixed up, thin, even layer of epoxy to the small part of the straws, but not within 1/4" or 6mm of the bendy part. Put the straws in the end of the aluminum, but only to within 1/4" or 6mm of the bendy part. If a lot of epoxy gets on the bendy part, wipe it off, both above and below.

Step 12 (Video Part 15): Seal Where Straws Go in

Be careful when handling the engine and mixing up a tiny bit more epoxy and using it to seal off the 3 or 4 holes where the straws go into the engine.

Step 13 (Video Part 16): Pressure Test, Seal Leaks

Take a tip from automotive people and use pressurized air into the straws to find leaks (bubbles in the water). Patch with epoxy and don't pressure test again until it is hard. Use hot water if you need to speed up the epoxy

Step 14 (Video Part 17): Make Angle Tool

Make a cardboard angle tool to set the angle between the aluminum boiler and the straws. You saved the pattern that printed out with the boiler pattern way back in part 7, step 4, didn't you?!

Step 15 (Video Part 18): Tape Engine to Angle Tool

Pull the straws longer and tape the angle tool to the boiler and straws. Make sure the folded-over edges are facing outward, not inward against the angle tool.

Step 16 (Video Part 19) : Glue Bendy Straw Part

Use one of the cooler kind of hot glue guns to apply a thin layer of hot glue over the bendy part of the straws, so as stiffen them so they hold the correct angle.

Candles and Candle Holder

Step 17 (Video Part 20): Cut Candles, Make Holder

Cut down thin birthday candles into 4 pieces, then make a candle holder out of aluminum foil. It's important to push the aluminum down to the base of the candle, or the candle will go out before burning most of its wax.

Note that a sharp viewer has created some great instructions for making an oil lamp instead of the candle for heat.

Powered Engine Test

Step 18 (Video Part 21)

You finally get to power test the engine! You don't need a boat to power test the engine. You must prime the straws every time you use the engine. And the first time you use the engine you should slosh some water around inside the engine so the little droplets of water can flash to steam and get your engine going. To start out put the candle flame in the middle between the front and the back of the engine.

Trouble Shooting

Step 19 (Video Part 22) (Skip This Step If Your Engine Works)

Troubleshoot if your engine doesn't work. SKIP THIS SECTION IF YOUR ENGINE WORKS OK. Sometimes you only have to prime the straws with water and try it again and it works. Or maybe you need a more heat if you are using a tea candle (don't use a lighter or you'll ruin the engine). Sometimes there might be a leak even though you already tested it. Still, it's not hard to find it and seal the engine. Sometimes the cause of the trouble remains a mystery and you might just have to make another one (Yep, I know, I thoroughly hate having to do things over too).

Post Test Tips, Boat Decision

Step 20 (Video Part 23)

Some tips when you're finished using the engine, like wiping off the carbon from the candle. Also, using heat to remove what's left of the candle and affix a new one so it doesn't keep falling out. Now is the time to decide which kind of boat to make for your engine. Instructions for the simple foam boat are in Part 24. But the instructions for the 3D milk carton boat are in Part 27, farther below.

Make a Simple Flat Boat

Step 21 (Video Part 24)

Make a simple flat boat out of a foam grocery tray. It's only held on with rubber bands, so you can move the engine to another boat later if you want. Funny, but it seems you actually have to put some weight to give the engine something to push against or the engine doesn't work well.    Foam Pattern

Make the Boat Faster

Step 22 (Video Part 25)

Make the boat go faster by restricting the straws a little at the end, just like real jet engines and rockets. Finally you can tell the control freak (me) to go soak his head, and you can break loose with experiments.

Parting Words

Step 23 (Video Part 26)

Congratulations and some final words. I depend on feedback to make the instructions better. And frankly, when you get the engine working it's encouraging to me to hear that as well.There is a gallery of pictures of people's pop pop boats that you can add your boat to. Also, now that you have made a boat, be aware that there is a Yahoo group of people from all over the world who experiment and talk about pop pop boats. Some people are just interested in engine development, or scaling up engines, others in making a beautiful boat for the engine, others in the history. There are nice people moderating the group, there is an enormous archive of tips and pictures, there is no money involved, and it's easy to join (if an internet dummy like me can do it, anyone can). And, we are mostly older people, but I think I can speak for the group that we would be thrilled to see the work that younger people are pursuing (and you are still welcome if you are a geezer like the rest of us).

Extra: Hull, Deck, Cabin and Rudder

Make a 3D Hull

Part 27 is making a 3D hull from a milk or juice carton.

Most of the video is from a video I made for my students years ago. This hull is made from a 1/2 gallon or 2 liter milk or juice carton. That kind of cardboard is waterproof, east to cut, bend, glue and paint.  Make sure that when you print the pattern you do not have any box checked that "fits to page" or otherwise changes the scale. After it's cut, it's folded and fastened with staples and hot glue.               Hull Pattern

After it's widened you can install the engine. The straws go out a hole in the bottom, so you seal and glue in the engine with hot glue.

If YouTube is blocked at your school, try the SchoolTube equivalents below.

If you want to watch one long video instead of 3 separate parts, you can watch the whole video here.

Video Part 27A

If blocked, try this SchoolTube equivalent of Part 27A

Video Part 27B

If YouTube is blocked, here is SchoolTube equivalent

Video Part 27C

If YouTube is blocked, try this SchoolTube equivalent of Part 27C

Make a Rudder

I got a wonderful tip about making a rudder for the boat from young Australians Elana (12) and Alex (10) who made putt putt boats with their grandad Les. Click here to see the PDF of the drawing of their ingenious rudder system.              Rudder PDF

Make the Deck and Cabin

This too is made from a milk or juice carton. It fits on top of the hull but comes off if you need to get to the engine. The PDF patterns for the deck/cabin assembly are here.  (You don't have to make the smoke stack, but the instructions for that are also here if you want to.)               Deck and Cabin

A hot glue gun puts all the pieces together.

Here are the YouTube video instructions for making the deck and cabin for the 3 dimensional hull.

Here are the SchoolTube videos.
The Deck and Cabin Part 1
The Deck and Cabin Part 2
The Deck and Cabin Part 3

Now that you've made an engine, hull and deck, check out the work of a true craftsman, my friend Daryl from Canada

How to Make a Propeller Stick

What you need:

  • Wire: Any of the following work.
    • Coat Hanger: For a lot of people, this will be the only wire they have without having to go out and buy something. The thick ones can be a little hard to bend, so use the thinnest one you can find. You will need pliers to bend it again and again in the same place until it breaks. This is called metal "fatigue." You need about a 12" piece.
    • Utility wire: Small, inexpensive rolls of solid steel, copper and aluminum wire are available from building centers and hardware stores. Thickness is denoted by a gauge number for maximum confusion. The bigger the gauge number, the thinner the wire is. Typically you will find utility wire that's around 20 gauge.
      One strand of this wire is too flimsy, but doubling and twisting a double strand is perfect. Start with a 24" (2 foot) piece and fold it in half. Holding the two ends with pliers, twist the wires together with a pencil or pen. The red lines indicate a break--only in the picture. It was getting too long to show the whole wire on the page.
    • Electrical wire: By this I mean the stiff, solid wire used inside the walls of houses not the flexible stuff used for appliance cords. If you know an electrician, ask if they have any scrap "Romex," any gauge. From that you can cut out three pieces of wire (black, white and bare). Use the bare one first, or strip off the last two inches of insulation where the propeller will spin. You need about a 12" piece.

    • Electric fence wire: I happen to have a roll lying around. Even doing this project with hundreds of kids a year, I've got a lifetime supply.
  • Cardboard: I use cereal boxes to help make people aware of how much stuff we waste, but poster board works.
  • Scissors, pencil or pen
  • Paper-punch The paper punch is convenient and it leaves a clean edge that works well on the propeller stick. You can punch the hole in the propeller with a pencil or pen.
  • Pliers Pliers help bend stubborn wire.

Step 1. Bend the wire

  1. It does not have to look exactly like the example. It should have a couple of gentle bends in the middle. Use pliers if needed.

  1. It should have some sort of handle on the back end that allows you to get a firm grip so the wire doesn't twist in your hand. It should have a couple of inches straight on the front end where the propeller has room to spin.

  1. If you are using thin wire that you doubled up and twisted, make the loop the front and the two ends the handle end. The loop will keep the propeller from falling off.
  1. Make a propeller that's about an inch wide and about three inches long. Try to get the hole as close to the middle as possible. A simple and accurate way to locate the center of a rectangle is to draw a straight lines from corner to corner.

    1. If you have hole punch, use it to make the hole in the center of the propeller. Skip the next two paragraphs to the next step.

      If you don't have a hole punch, you can punch through the cardboard with a pen or a pencil. Put a washcloth or sock or something on the table and the propeller on top so you punch into the soft stuff.

      The cardboard that was where the hole is now--but is now pushed out around the edge--can get in the way of the spinning. Use your thumbnail or fingernail to fold those tiny bits of cardboard outward so they lie down flat against the propeller. They will spring back up somewhat. That's OK.

    Step 3

    Make a stop to hold the spinning propeller on.

    Skip this step if you made your propeller stick out of thin wire that you twisted because the loop at the front end will keep your propeller on. For everybody else, if you wrap several inches of tape around the front end, not only will it help keep the propeller on, it can also blunt the sharp wire end.

    Step 4.  Try it!

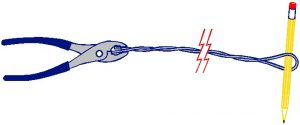
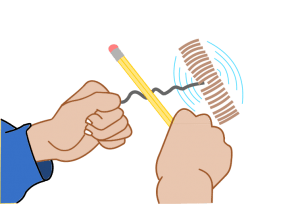
    If you are right-handed, hold a pen or pencil in that hand. Hold the pencil--not horizontally and not vertically--but at about a 45 degree angle. Grip the propeller in the other hand. Push the pen to the bumps firmly and rub. Once you "get it" it will be easy to get the propeller to spin furiously, but allow a few minutes this first time. Experiment. Rub fast, rub slow, hard, soft, vary the angle of your pencil.

I'd like to know how this project goes for you. I'm happy to answer questions about it. Feedback from you is an important way for me to know what works and what needs clarification.

Make an Easy Dragonfly Helicopter

I have bad news and good news about the EZ helicopter.  I used cheap injection-molded black plastic propellers for the easy helicopters but they have disappeared. Kelvin.com makes a blue plastic propeller that is supposed to be the same and replace them, but the blue ones don't work for helicopters (they might work well for airplanes, though). That's the bad news.

I had already figured out how to make propellers from the curved strips of 2 liter bottles and have instructions for those. Those propellers work much better than the old injection-molded propellers, but that was for building from scratch--quite a challenging project. What if I manufactured the difficult part: the propeller bearing? I have been making machines to make the parts for it and it's going well. I have made it with kids in large groups and at public event and I finally got around to making a step bu step instructional video. On a limited basis I am selling the complete helicopter kits for $1 each, which includes all materials: bearing, propellers, balsa fuselage, rubber motor and tool for cutting the slot. You can see the video and decide if you are interested. I will be tweaking it a bit so I do not have it as a final version on YouTube yet. But you can see it on my Google Drive here
https://drive.google.com/file/d/1sTdF1KsK_xG8X3A6xnReUfRzIk03JoXx/view?usp=sharing

Contact me. if you are interested

Below is an archive for the former page and instructions for the injection-molded helicopters


Wherein young Heroes become empowered by making and flying helicopters (whilst learning a thing or two about patience when winding them up).

Above is the instructional YouTube video. If YouTube is blocked at your school, click to stream on this highly compressed video

This video is an update, with some more tips.

Below are instructions for the easier version of Dragonfly Helicopter with an already-made injection-molded propeller. The numbers correspond to the steps,  also numbered on the video.

Pattern   Easy Helicopter Kits

Introduction

1.)     What if you just don’t have the time to make a Dragonfly Helicopter completely from scratch; and/or you’re working with young kids? The EZ Dragonfly does not fly as high as the scratch-built kind but it’s easier even for young kids to participate in building and making it goes fast enough that it works for a crowded event. It will still go as high as a gym ceiling. [You have to wind it up a lot though—a good way to learn patience. ]

Let's Get Started

2.)     Put a propeller on a balsa stick. Hold it close or else this might happen. [there are a few extra sticks if that happens]

You might notice that the propeller is not quite perpendicular. It’s OK, it’s supposed to be like that. [The reason is that the propeller is made for model airplanes, which tend to ascend at too steep and angle, then stall. But if the propeller is pointed slightly down, there is less stalling, better flight for model airplanes. And it does not hurt the flight of helicopters at all] The propeller is so efficient that it will act like a windmill when air hits it. But don’t clock somebody.

Rubber Band

3.)     This is the mother of all rubber bands. From one end, cut a piece 28 cm or 11”—which happens to be the length of North American printer paper. [A piece of 8 ½ by 11 printer paper—the long way—is a fast way to measure it. But A4 is longer. Use sharp scissors to cut. Nonstick scissors (Teflon coated) work especially well]

Tying is easy, but confusing at first. The overhand is the simplest knot there is—just make a loop and put the end through. But we put the two ends together and treat them like one strand.
[By the way, mountain climbers know this as the European Death Knot!]
But we need to move the knot to the end. Pull tight gently tight. Hold inside the loop, right next to the knot, and pull. Amazingly, the knot moves toward the end. This does not work with regular rubber bands, but this special stuff for model airplanes is amazing.

Hook the Rubber Band

4.)      The rubber band hooks onto the propeller in front, and it needs another hook in back. Try to make the back hook on the same side as the front hook. Cut or pull the cotton off a swab stick. Cut some tape and stick it in the corner at an angle like this. Wrap the tape around. Cut off the extra. The knot always goes in the back. [because it tends to get caught on the fuselage] We don’t want the rubber band to cross like this because of friction; but if it does, just flip the propeller the other way.

Make the Wings

5.)      Cut the wing from the flat part of a recycled foam plate or takeout container. Print out a pattern page and cut out a double pattern. Tape it on the ends. Rough-cut off those pesky edges. The thin foam cuts easily with scissors once you’re past that. Once you have a set, you have easy tracing patterns.

Tape the ends of the rectangles together. Get the rubber band out of the way and put the wing on so it’s about 25mm from the propeller. Attach it with a couple of pieces of tape. Rub the tape so it really stays on.

When you put the rubber band back on, make sure it does not catch on the wing like this—too much friction.

It’s optional to curve the wings up—which is called dihedral. It makes the flying more stable.

Splitting the wings to look more like dragonflies does not affect the flight. Be careful not to cut the rubber band.

Decorate if you want to.

Wind Up the Rubber Band

6.)     Your helicopter will go higher if you dab some soapsuds, liquid soap or shampoo right here to reduce friction.

As the propeller is facing you, wind the propeller clockwise. Most people do not wind enough at first. The first 50 or so turns don’t do much. You can wind more than 150 turns.

Alternate Paper Wings

7.)     [Paper is heavier than foam and not as rigid, so it is not rigid enough to stick out far away from the fuselage. But these paper wings with lots of surface area compensate. Note that paper becomes very limp and weak in humid weather. It might stop working once it absorbs moisture from the air.]

If you don’t have thin foam, you can make the wings out of paper. Although paper is heavier and doesn’t look like a dragonfly, it’s easy and flies almost as well. Just cut a piece of printer paper into quarters. It’s best to orient the long side perpendicular to the fuselage. Whatever side the back hook is on, put the paper on the OPPOSITE side. A couple pieces of tape hold it on. I like to clip the top corners. [the top corners of paper are weak, so they can flutter around and cause problems.

You can fly the helicopters just like this. An advanced aerodynamic trick is bending flaps in the bottom corners like this. It resists spinning even more.

[Some Science of Helicopters  (here is a printable version )]

As the wind from the propeller is diverted one way by the flaps, the reactive force on the wing the opposite way. If you make the flap the correct way, it makes the wing more effective for keeping the fuselage from spinning too much.

If this project works well for you, please help spread the word about a good hand-on science project. If it is not working well for you, communicate with me—Slater—about what’s happening so we can solve the problem. Also you can leave a message in the comments section below.


Build an Overhead Water Rocket Launcher

This is the version with the trigger mechanism. There is a simpler version here.

Sorry, no text instructions yet, only video instructions for now.

The updated directions are in instructional video form. You can see the whole video here . Alternately, you can watch one step at a time below.

Part 1: Introduction and Overview

This video lets you know what you're getting into if you want to make the overhead water rocket launcher featured on Ask This Old House during their special kids program. It uses inexpensive, readily available materials. It peeks at how the launcher works: the bump that seals the water and air pressure in the bottle, the zip-tie assembly that holds it on, and the spring that helps prevent accidental launches. And part 1 asserts that shooting a water rocket is analogous to driving a car--potentially dangerous, but safe if done with care.

Part 2: Materials and Tools.

For printer friendly supply list, click here. You can get the things you need at a building center, plus one thing at an auto parts store. The overhead water rocket launcher uses less than $10 US of actual material.

Substitutes for the 2" of 1 1/2" pipe

Observant correspondent Andrew Baillie of Atlanta discovered that you can substitute a 1 1/4" slip joint for the 2" of 1 1/2" pipe. Also you can make one from scratch. Read More>>

Part 3: Pipe and Valve

Install the Valve, Cut and Glue Pipe. You hook a bicycle pump to the launcher to pressurize the bottle. You drill a hole and install a common car tire valve. Then you can glue the plastic pipe together, which stinks (do it outside) but is not hard to do. You glue the pipe first so it will be strong by the time you are done with the rest of the launcher.

Part 4: Seal on a Bump.

I worked in Bangladesh in South Asia for an organization that promoted inexpensive water wells and hand pumps. It was there that I learned how to heat and form PVC plastic pipe. With only a candle you can create a little bump on on the small pipe that will seal in air and water while you pressurize the rocket. It's easier to make than a seal with O rings and more durable, too.

Part 5: Make the Trigger Mechanism.

An Australian water rocket enthusiast named Ian Clark came up with a simple, effective trigger mechanism that uses ordinary plastic ties (zip-ties).

Part 6: Make a Safety Spring.

A British Astronomer who--naturally--also tinkers with water rockets (sending up mini video cameras) devised a simple spring that helps prevent accidental launches. Fittingly, it's made from a 2 liter bottle

Part 7: Launch Tips

Here are launching tips like how much water and how much pressure to put in, and tipping water out of the launcher after each use. And how to modify a bottle to launch water balloons. In addition to the video version, below you can find more tips and answers, including some you won't find on the video.

Printer friendly version of the launch tips.

If the air pump locks up it's because too much water got into the launching tube and the check valve on your pump is not working. Then water leaked into the pump. The check valve is a one-way valve that is supposed to let air go out of the pump, but not go into the pump. It's on all air pumps, near where the hose goes into the pump, but it is usually not accessible for repair. You'll have to unhook the pump from the launcher and pump out the water. To prevent it from happening--short of getting a new pump--is to pump fast so there is little back flow and...

Tip out the water in the launcher after each use

If there is a leak as you pressurize the bottle you can readjust the zip ties for a better fit. If it's a hot day and you don't mind getting sprayed a little, you don't have to fix a small leak.

To adjust the launcher, loosen the hose clamp so you can slide the taped-together zip ties. You might want to mark on the pipe so you know how much you are moving them. Move them just 1/16" or so at a time, toward the bottom of the launcher to tighten the fit. If you move them too much you won't be able to get the bottle hooked on.

Very rarely, if the bottle has landed on hard pavement, the neck of the spout can crack, causing a leak.

How much water depends on what you want. You don't have to put any water in the bottle, which might be good on a cold day when you don't want to get wet. It makes a satisfying sonic boom when launched without water. Note, however that the trigger mechanism has to be well adjusted (see above) because air volume leaks out much faster than water.

If you want to get wet, you can fill the bottle up to half full with water. However, if you fill it much more than that it can be dangerous. Too much water displaces the compressed air, which is your stored energy source once the bottle is in the air. And the bottle is heavier, too, so a bottle with too much water might fall on someone before having ejected all its water.

When launching water balloons (see below) I find that a bottle 1/3 full of water works well.

How much pressure do you need in the bottle? Depending on how hard you have the bottle jammed onto the bump, you will likely need 30 or 40 psi of pressure just to get the bottle off of the launcher. And you need that much pressure to eject all the water before the bottle lands. Young kids will need some help getting the pressure high enough.

So how much pressure is too much? I talked to a bottle manufacturer who said they can guarantee the bottle will not burst up to 100 psi, but that is a new bottle, unscratched and not crushed, not left in the sun for weeks, etc. Although you can see bottles bursting at 168 psi, I stick to 70 psi maximum. If you are going to go higher, use a different kind of launcher where you are not so close to the bottle, and wear earplugs!

If your pump does not have a pressure gauge, you can unhook the air-pump use a cheap tire gauge from an auto parts store to check the pressure. With a typical bicycle tire pump, it gets pretty hard to pump after 70 psi.

If the bottle gets stuck on the launcher it could be that you need more pressure in the bottle (see how much pressure, above). Once, a bottle got stuck because the water inside was sandy. The sand lodged in between the bottle and the pipe, so even with a lot of pressure it would not launch. I was able to push off the bottle with my hand, still pointing up, of course. You can also disarm the rocket of its energy by unhooking the pump and pushing the inside core of the tire valve, which will let the air out.

What about fins on the water rocket? When we taped the Ask This Old House segment about water rockets, I was the overhead launcher construction expert. But the show’s producer, Chris Wolf, was the water rocket expert. He made some cool rockets with nose cones and fins, and they soared really high, much higher than the plain old bottles that I launch. Bottles tend to tumble around in the air, creating a huge amount of drag, so they don’t go as high. Fins keep the low profile of the nose pointing up, so the rocket goes higher.

But we found that the upside of adding fins to rockets is the downside as well. Unlike a tumbling bottle, they speed down hard and fast enough to possibly lacerate a scalp or break a windshield.

There're ideas on the internet for parachutes and other recovery devices to slow the descent of the rocket, but they're much harder to get to work than anyone thinks heading into it. So if you launch finned rockets, do it in a wide open space with no kids or cars nearby.

Launching water balloons Water balloons launched from water rockets go as high as finned rockets. Although the dense balloon would sting if it landed on you, it's unlikely that you would need stitches. I have heard of people launching tennis balls, too. The simple modification for the bottle to launch balloons is shown near the end of the video instructions. Of course you still have to launch water balloons in wide open spaces sans young kids. And it goes without saying that launching hard objects like stones could cause severe injury--or even kill someone. See Safety FAQs>>

Make an Eco-Empirical Dragonfly Helicopter with an Adjustable Propeller

IMPORTANT UPDATE:

Since making this video, I made another video for a design that is a bit simpler and uses more "off the shelf" parts (except the rubber band--school/office rubber bands just don't work well). It is not variable-pitch like this EE design, but for most people the newer version is better. So I no longer have the Eco-Empirical kit listed on the Dragonfly Helicopter store page. If you really need to make a variable-pitch helicopter, contact me. I still have some parts that I'll be happy to part with.
The newer video of the simpler, fixed-prop design is here.

Wherein the Hero takes a trashed plastic drink bottle and makes a propeller--a really good propeller--then the rest of the helicopter. Said Hero then imparts power to the magnificent machine, which flies to adventures above the tops of trees without batteries.

Here is the embedded instructional video. If YouTube is blocked at your school, click to stream this highly compressed video file (50 MB MPEG).

Eco-Empirical Dragonfly Helicopter Build Index

The text on this page corresponds to the instructional video about how to build Eco-Empirical Dragonfly Helicopters. The numbers correspond to numbers in the videos. Although much of the text is the same as video narration, you will also find more detail here that did not fit into the video. These parts are enclosed in brackets [like this].

Introduction

1.)   Hi, It’s Slater, the sciencetoymaker. In this video you’ll find instructions for making a flying machine that will go higher than the tallest trees.

 2.)   You can build it with a kit that includes such things as model airplane rubber bands, which store far more energy than regular office bands. ( We no longer sell the kits. Read Update).

1.) (Sorry, wrong numbering in the video)   These tools will help you:

  • A “low-temperature” hot-glue gun (the small, cheap 10 watt hobby kind),
  • tape,
  • needle-nose pliers and
  • scissors.
  • A single-edge razor is helpful but optional.

You’ll also need

  • a 2-liter drink bottle for making your own propeller;

and for the body, either

  • straws or food packaging foam. [It could be foam grocery trays that vegetables and meats/poultry come in; or takeout trays. It can even be made out of bamboo skewers or anything else that’s strong and lightweight. The video goes into this more].

And by far the most important thing is your attention and time. With some experience you might make a helicopter in 10 or 15 minutes; but this first time, when everything’s new, allow at least an hour of following directions. Experiment… after you get yours flying.

3.)   There’s some amazing science to explore when you build your own helicopter, especially Sir Isaac Newton’s 3 Laws of Motion and the ocean of air that is the troposphere we live in. Because you can adjust the propeller angle, you can experiment with crazy things like flying the Dragonfly upside down.  [I have created a PDF, linked here , about some of the science involved with helicopters. Sometime I hope to make it into a video].

4.)   If you want a wind-up helicopter that’s much faster to make and easier to make with younger kids, then check out this design that uses an already-made propeller. It doesn’t go as high, but it’s quick and easy.

5.)    So,what if you don’t want to buy anything—even if it’s inexpensive? We’ll cover some tips for making a basic helicopter just with stuff lying around the house. [I am ok with people not buying the kit. However, I think it’s a huge mistake to not use rubber band that is made for models because they store many times more energy than office rubber bands].

6.)    If any thing isn't clear, remember there is a linked web page with lots more details, and feel free to contact if you have any questions. [I am happy to answer questions, both general and help if you are stuck on something. Feedback from people like you is very important for me to know what is clear and what needs more explaining. I will put questions and answers on this page.]

[Making the Build Go Faster: If you do some steps ahead of time, then you can save time later. For example, it is more efficient for one person to cut all of the red hose pieces in one go than it is for each person to cut off some. If you do not want students to handle a razor, you might want to cut all the swab sticks and cut the slots with the razor ahead of time.]

Let's Get Started!

7.)    Link to Pattern PDF    [Although a pattern page is included in kits—and you could photocopy that—you will probably want to print out more pattern PDFs. It is important to do this with no scaling. You should be able to print out the pattern on either 8 ½” by 11 or A4 printer paper. If you have trouble printing on A4 please send feedback to me so I can correct the problem. How you get it to print out with no scaling depends on whether you are printing from a browser (and which browser) or PDF reader. Go for settings like “100%” or “full size”.
Avoid settings like “fit to page” or “shrink to fit” or any scaling except “100%”. It’s easy to know if it printed OK. Just put a ruler up to the ruler printed on the page and see if it is to scale.  If you have problems with printing the correct, again, please contact me and we can try several things to get it right.]

Straighten the aluminum wire if necessary. If you printed out the PDF pattern, now is a good time to make sure that it printed to scale.

Make The Hub

8.)    Cut off a 5 cm piece of the aluminum alloy wire. Aluminum is softer than steel so you can use scissors. [Steel wire should be cut with the wire cutters (needle nose pliers usually have a place for cutting wire) because it can nick the scissors. But thin copper and aluminum wires are soft enough to cut with scissors. More than ok, its actually better to use scissors to cut the aluminum wire in this case. Wire cutters (especially if they are dull) tend to mash the wire’s end a little, which makes it hard to thread on the little beads (bearings) in a later step.]

Grab the very end with the very tip of the needle nose pliers. Not part way into the pliers and not sticking out. Flush. Bend 90 degrees, pushing at the wire right next to the pliers so that's a sharp bend. Here’s a side view. If you do it right, it should be close to this pattern. [I think that I made it clear in the video, but it is much better to make sharp bends. When the wire is more rounded, sometimes the rubber band “climbs” out of the hook when wound. It is very strange, and I have not figured out why it does that. But the whole problem is avoided if you apply pressure close so the bend is sharp].

Push the tip of the pliers against the first bend, and bend 90 degrees again, always applying force close for a sharp bend. Bend yet again and you have an offset square. Make it a centered diamond, like this. Grab here inside and bend 45 degrees. This wire is the propeller shaft. Don’t lose it! [It is not a good idea to try to straighten a sharp bend. Usually the wire will break. There is some extra wire included in the kit, but not enough if lots of people break their first one.]

9.)    Take the cotton off the swab stick by twisting at the end of the swab. Unfortunately, some are tightly wound and very difficult to get off, but I’ve been experimenting. Dipping in water makes the cotton easier to remove. Dipping in hot water is even better. [The hotter the water is, the more it seems to relax the cotton fibers, so it’s easier to get off. I use really hot water if I have a lot of sticks to deal with.]

[I get some strange looks when I buy a thousand swab sticks at a time. One guy even said, “I guess you have a lot of earwax!” With the first batch of sticks, it was quite easy to twist the cotton off. But when I bought another batch, I was horrified to discover that it was very difficult to remove the cotton. Panic! I was very relieved to find that wetting them makes it much easier to get the cotton off; and hot water even more so.]

[Cotton is mostly cellulose; it’s fibers similar to paper. In fact, some of the most expensive paper has cotton fibers added.]

[Cotton swab sticks are a marvel of material science and engineering! The polypropylene that it’s made from is strong and lightweight. Those qualities are enhanced by the cylindrical shape, which is known to engineers to provide lots of rigidity with a minimum amount of material. Furthermore, polypropylene has a “low friction coefficient” (is slippery) so it makes a good bearing. ]

Look close and notice the tiny channels melted into the ends that helped keep the cotton on, because they will matter in a later step. [These bumpy ends provide just the right amount of friction when stuck in the red nylon tubing, to be adjustable.]

Center the stick on the pattern; mark to get a 13 mm section in the middle; and equal length pieces on the sides. Cut straight across; NOT at a slant. Don’t lose these!

Slide this small section on the wire shaft. Slide two of these tiny seed beads on next, to reduce friction [these are low-friction bearings]. It’s really easy to lose these!

Make Variable Pitch

10.)    Hold this red tubing on the pattern—if possible, with the concave, inside curve on the bottom. With the end lined up with the pattern, make two marks. Cut off on the second line. [if working with groups you can save a lot of time by cutting these ahead of time; maybe punch the hole, too].

Use the push tack to punch a hole at the mark in the middle. [It’s a good idea to back it up with some cardboard or foam so the tack does not go into the table]
Push the wire shaft--with all the other stuff on it—through in the same direction that the tack went through. [it’s just easier to get it on that way]

11.)    We need a bit of wiggle room, so we’ll slide the red thing so the stick goes to the hook; then grab the wire with the very tip of the needle nose pliers. Push the wire over, applying pressure close to the pliers, for a sharp 90-degree bend. The space created by the plier tips gave us our wiggle room. Push it together and wrap a piece of tape tightly around several times. Cut off the extra wire and tape.

Remember the tiny channels at the end? That bumpy end needs to go in the red sleeve because the little grooves provide just the right amount of friction for adjusting. [it does not matter what angle at this time] [hold close to the end so the swab stick doesn’t bend] It should spin freely.

12.)    I’ll use a green bottle for the propeller blades—it might show up on camera better. If you’re just making one, use this pattern—lengthwise like this. But if you’re making lots, use this bulk pattern. Cut near the ends. [The pattern has to fit so it’s only on the wide, cylindrical part of the bottle. ]

There might be a bump that rings the bottle, right where the widest part starts at the bottom; line up the edge there. [If there are two, use the one closest to the bottom. ][The objective here is to get all of the actual propeller pattern on the cylindrical part of the bottle, not the rounded parts at the top and bottom.]

Rough-cut the bottle, starting the cut with a razor. [When cutting the propeller blades by cutting on the pattern, cut by the numbers. 1 cuts the narrow strip; 2 cuts in the middle (but the tape still holds the pattern in place); 3 cuts the other end (and the paper pattern falls off).]

13.)    We’ll flatten and split the strut end for strength.
[There’s a place in needle nose pliers that’s flat and about a centimeter [3/8”] across.]
Put the stick into the flat of the pliers, flush with the other side, and squeeze hard to flatten the end.

It’s dangerous to cut toward fingers; so wrap a rag around so your fingers are out of the way of the razor. Make 2 cuts at the bends, splitting into two flattish flaps. There’s an alternate method with scissors if you are dead-set against using a razor. [I used to use hot glue to stick the blades to the sticks (struts). It worked sort of ok, but the hot glue sometimes warped the plastic. And sometimes in cold weather the glue would fail. Now that I use the split end and tape, there are no troubles.]

The propeller attaches in the middle and goes straight. [Place the top of the tape even with the top of the stick.]

The top of the tape lines up with the top of the strut. If you put the tape on gently at first, then you can adjust it straight before sticking on hard. Tape the other side, too.

Cut off extra, and cut off triangles of tape, corner to stick. The outside corners are sharp, but just cut a tiny bit off.

14.)    If you want to pre-adjust the blades now, the wire is below; the concave, inside curve faces down; then the blade that’s close to you tilts the right side up about 22 degrees from horizontal, or use the gauge.  [There is a more detailed explanation later in the video]

A little air should make it turn like a windmill now, but don’t clock the person next to you.

Cut And Tie The Rubber Band 

15.)    This is the mother of all rubber bands. From one end, cut a piece 28 cm or 11”—which happens to be the length of North American printer paper. [A piece of 8 ½ by 11 printer paper—the long way—is a fast way to measure it. But A4 paper is longer. Use sharp scissors to cut. Nonstick scissors (Teflon coated) work especially well]

Tying is easy, but confusing the first time. The overhand is the simplest knot there is—just make a loop and put the end through. But we put the two ends together and treat them like one strand. [By the way, mountain climbers know this as the European Death Knot!]

So here goes: rubber band ends together, loop, ends through. Pull a little tighter, gently.  

Now we need to move the knot to the end. Hold inside the loop, right next to the knot, and pull. The knot actually moves toward the end. This does not work with regular rubber bands, but this special stuff for model airplanes is amazing.

Make The Fuselage (Body)

Fuselage 1 : Straws

16.)    You can make the fuselage out of just about anything: recycled foam trays, drinking straws, bamboo skewers, etc. as long as there is space for the hook to spin.
We’ll start with plastic straws because they are ubiquitous [everywhere] throughout the world.

Measure the long, not-bendy part of two straws to about 14 cm, although it’s ok if there is some bendy part on the end. Tape the ends together.

Whatever you use, the propeller shaft has to be spaced about 3 mm away from the body so that hook has room to turn without rubbing.  I glued this one on without a spacer… and the propeller cannot turn freely [because the hook rubs]. Fortunately, remember you can always re-melt hot glue with the tip. Make sure that you are using one of the lower-temperature guns. [cheap, low-temp, 10 watts]

So this time we’ll cut off a square of the spacer material. Glue it onto the not-bendy end of the straws like this. Tack on the hub so that some sticks out on both sides. Then cover it with a thin layer of glue. Spreading a thin layer of glue makes a strong connection, but making a thick blob just adds too much weight. It’s really important to not get glue on the ends, where it could rub against the wire. If glue does get on, find a way to get it off.  [A thin layer of glue spread all around holds everything together. A thick layer does not add strength and would just add more weight.]

The rubber band hooks on the front, the knot always goes on the back.

We’ll make a back hook from part of another swab stick.It’s a good idea to slant the stick slightly back so the rubber band doesn’t fall off. Spread a thin glue layer for strength. The knot always goes in the back. [Use part of another cotton swab stick for the back hook. The rubber band hooks here so the back hook goes on this side, too. Because the rubber band will be pulling toward the front, I like to lean the stick slightly back.]

Without any wings, the fuselage just spins too fast and it doesn’t fly. So put a wing in-between the straws. If the wing is too loose, tape the straws together around here to make it a tighter fit.

Bending the wings up gradually is called dihedral and it adds flight stability. Splitting the wings is optional. You can also decorate.

This gauge can help you start with a propeller angle that gives you good flying. The concave or inside curve faces down. The gauge is parallel to the straws. The end of the blade that is facing you should line up with the gauge.

You can fly your Dragonfly now, but check out the flying tips to get best results.

FUSELAGE 2: FOAM GROCERY TRAYS

17.)    I like recycled foam grocery trays and takeout containers best, but they are not available everywhere. [in some less-wealthy countries, they are never were available; in some wealthy, environmentally conscious places they have been banned] I do not like the ones with bumps because they are not as strong.

There are lots of ways to cut the foam. If you are making a lot, hotwire cutting is fun and fast. But scissors or razors work well, too. [this page is for hotwire cutting very thin foam for walkalong gliders, but still gives an ok introduction. ]

Some trays have thick foam and others thin. This one is strong enough even when the rubber band is pulling; but this one—yikes! Foam that’s 6 mm thick might be ok with a strip 2 cm wide [about 7/8”]. If it’s thinner foam, you might have to make the strip 3 cm wide to get enough rigidity. Or you can tape together 2 thin foam strips. The stiffness is a function of the square; even though it’s only 2 times thicker, it’s 4 times stronger. This thin foam from a takeout container was not strong enough even with 2 layers. But 3 layers worked. If it’s too flimsy, just add another layer.

Same as the straws, the fuselage is 14 cm long. Cut a square piece from the spacer strip and glue it on. Center the little tube on the square and spread a thin layer around for strength. Again, don’t let glue get where it will rub moving parts, or get it off if if does get on.

By the way, you can use the curved edge of the tray—precisely cut--as the spacer, instead of the glued on square.

The easy way to attach the rubber band in back is to cut two little slots, 1 cm apart. The knot always goes at the back, away from the propeller. A hacksaw blade also works well to cut the slots.

The wing goes on about 25 mm [1 inch] from the front end of the foam, with two pieces of tape.

Bending the wings up gradually is called dihedral and it adds flight stability. Splitting the wings is optional.

As with the straw fuselage, this gauge can help you start with a propeller angle that gives you good flying. You can trace the angle on.

Flying Tips

18.)    As the propeller faces you wind up clockwise, a lot! The first 30 or so turns don’t do much, but when you keep winding so it’s twisted, knotted, double knotted, it really gets powerful. You can wind more than 150 turns.

19.)    The reason these dragonflies are bouncing around is the propellers are not balanced. It’ll still fly ok; but to balance, take off the rubber band. The heavier side will always go down. Either cut a little off that heavier end; or, add some tape to the lighter end.

20.)    When you want to see the highest it can go, rub some baby shampoo, soap bubble solution or even just soap lather or liquid soap into the rubber band. It makes it more slippery so you can wind it more and store more power. [do not put oil, grease, petroleum jelly or any other hydrocarbon product on the rubber band—it will destroy the rubber]  Also put something soapy/slippery in the hub bearing to reduce friction.

21.)   To make the helicopter fly upside-down with the propeller on the bottom, twist so the concave side also faces down. Assuming you wind it up the same way, the left side tilts up 20 to 25 degrees. [ The gauge gives you a good propeller angle and you can experiment to find an even better angle. But it won’t fly with too much or too little angle.]

22.)   Avoid extremes of heat and cold. You can’t wind up as much in cold weather. Do not store rubber bands in sunlight.

23.)   You can send time-release gliders up in your helicopter and make the auto-gyro returns, as detailed here.

24.)   If you use a geared winder, not only can you wind faster; but you can put more twists in—and therefore more energy--because the rubber is stretched out at first. If you wind this way, you might want to make this kind of hook with a swab stick in the back.

[If you do use a geared winder, you can use rubber that’s up to 1½  times longer—so it droops. You start winding with the rubber quite stretched and get closer as it winds up. Experts use torque meters and other advanced techniques. They also use advanced lubricants (not baby shampoo that I use). I am not an expert, but even with my crude winding and lubrication the helicopters go almost out of sight, so I’m happy. If you know of good advanced resources on the internet and share it with me, I will share the links on this page. ]

25.)   You can repair the wings with tape if they break.  If the wings keep breaking, you can substitute with one made from a foam plate.  They are heavier, but also more durable.

Off The Shelf Build

26.)   So maybe you can’t, or you don’t want to buy the kit. That’s ok, but the most important part of the kit is the special rubber band made for flying models. I’ve experimented with everything—even making rubber bands from bicycle inner tubes. The fact is, Tan Super Sport rubber made specifically for flying models holds many times more energy than office or school rubber bands. Why go to the trouble of making a great machine, only to power it with low-quality rubber bands?

You’ll also have to use heavier steel paper clip for the propeller shaft, straightened out. Bend the hook in as per the previous instructions. Cut a 1 cm piece of cotton swab stick and slide it on. Instead of the tiny beads to reduce friction, you can make a washer from a scrap of the bottle. Make a hole with a tack and either punch it or cut it out. Put that on. Cut another swab stick to 5 cm and mark a hole in the middle. Punch the middle hole and put that on the paper clip, too.

We’ll use the same spacing trick as before when making this bend. Cut so there’s about 1 cm remaining—don’t use scissors for steel paper clips. Cut the slots in the end and tape, same as the variable-pitch design. But now we have to set good propeller angles. I used to glue on with a jig made from straws, but had problems with the hot glue warping the propeller. So now I use a 22.5 degree pattern. [Or you can make your own by folding 90 degrees to 45 to 22.5.] Tape to the lower jaw, at the flat part. Put one end in to the other side of the pliers. Then rotate left so the shaft is parallel to the pattern edge. When you squish the stick now, it will be at a good flying angle. From here on the propeller is the same.

Put something soapy here in the hub to reduce friction.
I’ve tried everything I can think of to get more power from regular office and school rubber bands. With regular rubber bands I get a burst of power, but it’s very short. I liberated the thin rubber strips from an old bungee cord. I was hopeful, but they only worked slightly better. [They are really difficult and time-consuming to remove. And they are difficult to line up and tie.] Just switching to Super Sport model rubber gets the dragonfly many times higher and it stays up many times longer.

I mentioned that making wings from foam plates or takeout trays is heavier than the wings in the kits (so they won’t go as high), but they’re also more durable. Grocery store trays are even thicker and heavier, but there’s you can experiment and maybe you’ll find a way to use them. I’ve also made wings by shaving weight off bamboo skewers, with paper. Reminds me of a bat [Grocery store trays are much thicker and stronger than they need to be for wings. So I’ve experimented with making thin slices that go out far away from the center of rotation; then putting wider winglets at the end. The winglets gain lots of mechanical advantage (leverage), for resisting the fuselage from spinning, by being away from the center of rotation. I started out with small trays because they are thinner (not as thin as foam plates, though). Then, for the outside winglets (white squares in the video). I sliced them to get two from one, half as thick.]

If this project worked well, please spread the word of a good science project. If it did not work well for you, please contact me, Slater, or leave a message in the comment section at the bottom of this page and tell me what’s happening so we can get it flying.