Make Your Own Propeller


NoteThe video below is about how to make a dragonfly helicopter. It goes into detail about how to make the propeller with materials you can find around the house. You can make a propeller for the balsa wood plane in the same way.  The web page associated with the video is here.

Here  you can find the patterns for the propeller. 

Here is the pattern to make lots of propellers from a 2 litter soda bottle. 


Build a Balsa Wood Rubber Band Model Airplane

NoteThe instructions are only in video form. I got my materials from Kelvin.com. The items listed below are linked to the website. These links work as of December 2017.  Kelvin has a minimum order, so if you are just making one or a couple planes, I suggest you get a simple kit from your local hobby store. Alternately, this page has a very good design that can be built from common materials.

I now tell my students to crumple the tissue paper for the wings and then flatten it out again. That is because it absorbs moisture from the air and eventually shrinks, sometimes causing the wing to warp. Also, the video says to tape the wing 3 inches from the front. If the plane has trouble climbing, try 2 1/2" instead.

Here are some instructions for making a homemade propeller from a 2-liter plastic soft drink bottle.


Make a Tumblewing

Astonishing! You are flying a piece of paper, surfing it on a wave of air created with cardboard. There are many branches of walkalong gliding, but the Big Mouth Tumblewing is the easiest way to start. You only need phone book paper or newspaper. This video starts with a introduction, then instructions for making and flying tumblewings.

Links

Make and Fly a Tumblewing Instructions

More Tumblewing Instructional Videos

Here are some other instructional videos about making the classic, original tumblewings. This one is by John Collins (The Paper Airplane Guy and tumbling wing inventor).

Here are some by Phil Rossoni.

And here is Phil's Instructables page.

Once you master making and flying tumblewings, the next logical step is foam gliders.

I'd like to know how this project goes for you. I'm happy to answer questions about it. Feedback from you is an important way for me to know what works and what needs clarification.

Surf an Origami Big Mouth Tumblewing on a Wave of Air

Astonishing! You are flying a piece of paper, surfing it on a wave of air created with cardboard.

Next to the dihedral magnus effect glider, the Big Mouth Tumblewing is the easiest way to start flying a walkalong glider. You only need phone book paper or newspaper. The pattern here.  This video starts with a introduction, then instructions for making and flying tumblewings.

"Flying Fish" or spinning blimps are simple and quick to make, and you can fly them as walkalong gliders.


I'd like to know how this project goes for you. I'm happy to answer questions about it. Feedback from you is an important way for me to know what works and what needs clarification.

If your glider is attracted to the board…

Static Cling and Walkalong Gliders

Even though this video is not fully completed, it shows how to work around static cling, avoid it or discharge it.

One day I tried to demonstrate air surfing in a classroom. It was not working. When the air-deflecting board got close to the glider, they were attracted. I finally figured out that static electricity was causing the problem. That time it was because the room had carpet. It can also happen when people unconsciously rub the boards against their clothing--particularly when the weather is cool and dry.

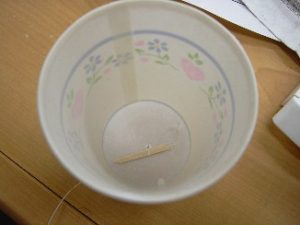
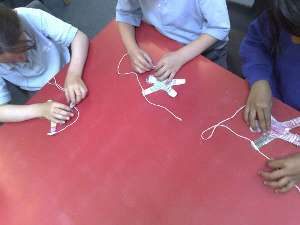
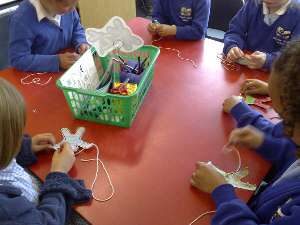
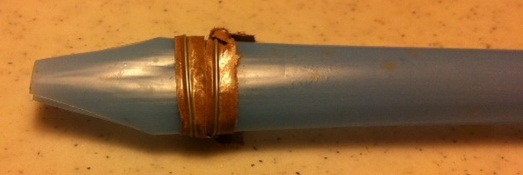
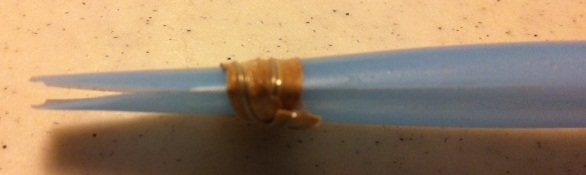
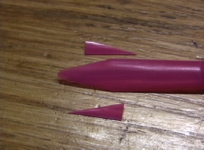
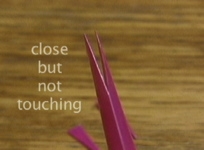
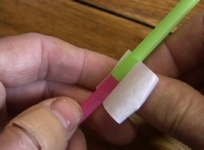
Here are some ways to get rid of static charge. Rub the board with a wet rag or something. Dampness kills static. If the glider itself has static charge, then hold it in the steam (actually water vapor) over a bowl of very hot water. You can dab it with a slightly damp washcloth, but if it gets wet, you'll have to let it dry. Just a few drops of water will add too much weight.

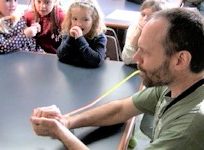
If you do not know how walkalong gliding/air-surfing works, this might be confusing. Walkalong gliding does NOT use static electricity at all; it only uses deflected air to levitate gliders. However, you can use static electricity to levitate tinsel, thin plastic, etc. There is even a toy that is a hand-held Van De Graaff generator that makes things float. And to make things even more confusing, static electricity can attract AND repel things.

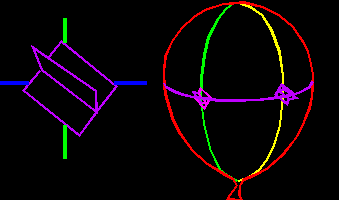
So of course by now you are thinking, "Why not combine aerodynamic with static levitation. And indeed my friend Nyle Steiner has done some work with that.


How to Make the Floating, Spinning Balloon

Note: If you want a very quick, easy project, you can stop after the first two steps. The balloon won't spin, but it will float.

What You Need

  • Round balloon
    Look at a discount store like Walmart in the section where they sell birthday party supplies. If there is more than one size of round balloon, get the bigger size.
  • Hair dryer with long nose
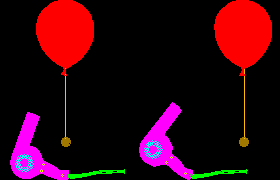
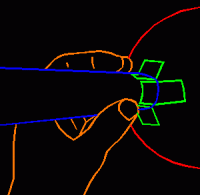
    The hairdryer has to be the kind with the long front nozzle--as shown in the picture--so the air stream is well directed. Unfortunately, this style is hard to find these days. Perhaps a store that specializes in barber supply products would have them. A vacuum cleaner hooked up the wrong way so it blows out air instead of sucking it in might work. I have not tried a leaf blower yet, but that might work.
  • Tape, string, pennies, ruler
    You can use dental floss, thread, or whatever for string
  • Optional
    Scissors, marker, paper

STEP 1: Inflate the balloon, attach string and weight.

  1. Inflate and tie off a round balloon.
  2. With about a foot of string, tie one end of the string to the balloon.
  3. Tape one or two pennies to the other end of the balloon. With one penny, the balloon hovers farther from the hair dryer. With two pennies it is more stable. You can fly it right now, although it won't spin yet.

STEP 2: Fly the balloon

Set the hairdryer for minimum heat. Experiment with the air-flow setting. High flow flies the balloon farther away. Low flow might allow more stable flight.

Start flying the balloon above the hair dryer. Then you can slowly tilt more and more so the balloon will hover farther away.

STEP 3: Start laying out the tape-turbine locations.

The small, angled tape protrusions will spin the balloon. This step and the next are optional, but helpful, especially the first time for getting the tape evenly on the balloon. That makes it more stable. It also provides a learning opportunity for kids as the balloon is divided into hemispheres, quarters, then eighths.

With the balloon oriented as shown, use a magic marker to draw an "equator." I have never been able to draw a decent looking line. It has not hurt the performance, but if you want it to look good, try this: Wrap a long strip of paper or a sheet of newspaper around it and trace on the edge.

STEP 4: Finish laying out tape-turbine locations.

Now draw two meridians perpendicular to the equator and to each other. The illustration shows a side view, the right side shows how it looks from the top.

STEP 5: Make the tape-turbine pieces.

Cut off a one and one-half inch piece of tape and fold it as shown. The middle will stick together, but fold one quarter inch of each end out so they do not stick to each other.

I always mangle half of the tape, and even the best are not quite right. The balloon still spins great. If you really hate working with tape, try cutting and folding plain paper strips, then stick them to the balloon with a glue stick or tape.

Step 6: Stick tape-turbine blades onto balloon.

Stick on one piece of formed tape (or paper) at each of the equator / meridian intersections, angled about forty-five degrees from vertical. They all have to slant the same way. The right illustration shows a close-up view.The balloon might spin now with just the four turbine blades. Try it, remembering that you still need the string and one penny attached.

STEP 7: Stick on more turbine blades if needed

Stick four more tape blades on the balloon in between the tape already there, as shown.The balloon should spin quickly and fly with more stability than when it was not spinning.

To see an even more stable design, as well as activities to do with the spinning balloon, go to the following steps.

STEP 8: If the balloon seems too wobbly, replace the string and weight with a paper tube (optional).

Use an ordinary 8 1/2" by 11" sheet, and roll it up so it is long (11"). Roll it tightly enough that the wall of the tube has two layers, which will make it about 1 1/4" in diameter. Tape the tube so it holds its shape.

STEP 9: Tape paper roll to bottom of balloon.

Tape the paper tube onto the bottom of the balloon

Tape it on the underside so it is exactly centered on the outlet of the balloon, with four pieces of tape.

Now try flying it (no need for the penny now) If you got it centered it should be more stable.

Put a cup on the edge of a table and try to land in the cup. It's not easy, is it? It makes me appreciate how difficult and dangerous it must be to land a helicopter in turbulent wind.


I'd like to know how this project goes for you. I'm happy to answer questions about it. Feedback from you is an important way for me to know what works and what needs clarification.

Make a Moose Call

What you need (see the pictures below)

  • Disposable plastic cup (best) or paper cup or coffee can. You can use other things, but I know these work.
  • Some kind of string, about 2 feet (60 cm) long. I've used cotton string, nylon twine and dental floss. I've even heard of people using shoe laces.
  • Something sharp and round to punch a hole in the cup.
  • Something to keep the string from pulling out if a knot doesn't work (you might not have to do this, but you will if the string is thin like dental floss or with a paper cup. You can use a matchstick or toothpick or twig.

Step 1

Punch a small hole in the middle of the bottom of the cup--just big enough for the string to fit through--and push the string through the hole.

Step 2

There are two ways to attach the string to the bottom of the cup:

Tie the end to the matchstick or toothpick. This is more work but better because you don't have to be as careful about yanking too hard.

Alternately, tie a very big knot on the end of the string that goes through the cup, to keep it from pulling through the hole. I use a variation of the simple "overhand knot." However, I loop it several times to make the knot fat.

How to use the moose call.

Usually, you will need to wet the string. Wetting it serves the same purpose as the rosin applied to bowed string instruments. You might not have to with waxed dental floss. Hold the cup in one hand and the string--near the cup--between thumb and forefinger. Pull. You should hear a noise, and it should be loud.

Here's a short (5 sec) video of some kids making it work.

Ethan Maas of Seattle, Washington sent the following innovation:

I made the Moose Call that's on your site but I made the string a little longer than you suggested. I was feeling lazy and I didn't want to measure it exactly...anyway this made it possible for me to step on the string and pull it taut. It was then I I began to pluck it while loosening and tightening the string. It worked much like a washtub bass. I didn't know if you care about this bit of information (I imagine that you already knew it), but in the off chance you may want to include this on your site...or maybe not....
Ethan

Actually I didn't know, Ethan. Thanks for the suggestion!

I'd like to know how this project goes for you. I'm happy to answer questions about it. Feedback from you is an important way for me to know what works and what needs clarification.

How to Make the Oscillating Woodpecker

Ruth in the UK sent some pictures of her students making and using the woodpecker project.

What you need:

  • 1/4" (6mm)OD clear PVC tubing plastic or drinking straw.
    The clear 1/4"(6mm) tubing is available from any hardware store. It is sold by the foot off rolls. You only need 1" per bird, but get a couple of feet to make a curvy, loopy drinking straw (like a "Krazy Straw"). It is food grade. You can substitute a rigid plastic drinking straw. The thin kind school cafeterias always seem to have are the best.
  • thin rubber bands
    How thin the rubber band is determines--more than anything else--how well the project works. If you are using a rubber band assortment, use the thinnest ones.
  • white poster board, scissors, tape
    The poster board is about as thick as cereal box cardboard. Cereal boxes are one of my favorite things to recycle, but for this little bit use white poster board, which takes coloring well.

Assembly

step1: Print the pattern, cut out the body and wings.

  1. Print out the pattern. Some browsers and PDF viewers change the scale and the size of the printed pattern. Choose the print options that say something like "Actual Size" or "Scale: 100%." Also, the printout has a scale check. It says 2" line to line or 5 cm line to line. Make sure it's accurate.

  1. Rough-cut out the body and wings. Use tape doughnuts to stick the patterns to the cardboard. Fine cut the pattern of the body and wings. Tear the pattern paper off the three cardboard pieces, but first bend the cardboard a little on the line between the two halves of the bird.

  1.  Use tape doughnuts to stick the patterns to the cardboard.

  1.  Fine cut the pattern of the body and wings.(Cut along the outline)

  1. Tear the pattern paper off the three cardboard pieces, but first bend the cardboard a little on the line between the two halves of the bird.

Step 2: Cut a 1" piece of tubing or straw, tape

Tape the straw securely into the fold in between the bird halves. The same amount of straw should stick out the top as the bottom. Use three pieces of tape on top of each other to really hold it on.

Step 3: Finish assembly and try it out.

  1. Use a tape doughnut to hold the two halves of the body together, and to attach the wings.
  2. Cut the thinnest rubber band you can find and thread it through the straw.

  1. To make it go, get the woodpecker toward the end of the rubber band that the head points to.
  2. Stretch the rubber band vertically. Make sure your hand is not near your eye, so the rubber band will not snap your eye if it breaks.
  3. Shake your hands up and down a few times, then suddenly hold them still. The bird should keep on bobbing... and bobbing...and bobbing all the way down until its potential energy is exhausted.

Note: If the wookpecker won't work...

...you can experiment with making the diameter of the straw smaller.

How To make the diameter smaller

  1. Slice the piece of straw lengthwise.

The cut edges will overlap a little, decreasing the diameter.

  1. Squeeze the straw a little bit so the edges overlap, as shown at right. Tape so it stays overlapped as much as you want it.

I'd like to know how this project goes for you. I'm happy to answer questions about it. Feedback from you is an important way for me to know what works and what needs clarification.

How to Make the Climbing Creature

Ruth from the UK sent me some pictures of her students making the climbing creature as an old toy, part of their history project.

The only problem, she reports, was a mixup, at first, of inches (I've added some metric measures).

What you need:

  • A piece of poster board at least 5" by 5" or 13cm by 13cm (it should be as stiff as cereal-box cardboard).
  • String (5 feet or 1.5 meters) Note: If you use yarn, it will probably get stuck. Nylon line(mason's line) is the best because it's slippery.
  • Plastic drinking straw
  • Scissors, tape
  • One or two coins
  • Pattern
  • (Optional) Tongue depressor
  • PDF instructions, if you want to print out.

Step 1: Cut out the body.

  1. Print out the pattern. (Use landscape mode)
  1. Rough cut (bubble cut) it out.

  1. Stick "tape doughnuts" (pieces of tape stuck end to end--sticky side out) to the back of the pattern at the hands and feet
  2. Stick the pattern onto the cardboard.

  1. Now fine-cut the cardboard on the outside pattern lines. The two lines on each arm just show where the straw will be taped later.

Step 2: Tape on the straws, coin.

  1. Peel the pattern off the cardboard, but first notice where the lines on the arms are, and how they go across the arms.
  2. Cut straws as long as the arms are wide (about 3/4").
  3. Tape the straw pieces on. Press the tape on hard, because the straws take a lot of stress.

  1. Wrap another piece of tape around the arm perpendicular to the first, as indicated by the arrow. Think of this as taping the tape that holds the straw. I can tell you from experience that kids pull so hard they rip the straws out unless they are really fastened in.

  1. Tape a coin somewhere. I usually make it a giant belly button. (as in the figure below) The coil provides weight so the climber slides back down when you let go. Sometimes you have add a second coin if the climber gets stuck, but try it with one.

Step 3: String and test the creature.

We can string the creature and test its climbing now, using a doorknob (step 4 will free us from having to rely on a doorknob).

  1. Cut about a 5' piece of string.
  2. Thread the ends through from the top.  Tip: Wrapping a little tape might help keep the string from unraveling and make it easier to thread through.
  3. Once it is through, a bigger piece of tape will keep the string from pulling back out.

  1. Hang the loop of string on top of the creature on a doorknob.
  2. Making the creature climb is very easy to show someone, and harder to describe in words. With both hands, pull down very gently on both strings.
  3. Pull one string down while allowing the other string to rise. The creature will tilt one way and go up.
  4. Pull the string that was going up down instead while letting the other string go up. The creature tilts and rises again! And so on.

Step 4: Make a pivot

Making a pivot is optional, but it frees you from having to use a door knob. Before you start, see if you can figure out how the climbing creature works. Adding the pivot limits how far you can pull the string down each time, making it a bit more of a challenge to figure out.

  1. Wrap about a 1' piece of string a couple of times around the middle of a tongue depressor, popcicle stick or piece of dowel about as long (6"). Tie it tightly. If it slides around, tape it so it stays in the middle.

  1. Determine the middle of the loop of string on top of the creature. Tape it securely to both ends of the tongue depressor. Use several wraps for strength. Kids pull pretty hard.

You can tie the pivot string around a pipe or tie a loop in it to hang it from a hook. Sometimes when doing this project with groups where there is nothing to hang from, we tape the pivot string to the wall.


I'd like to know how this project goes for you. I'm happy to answer questions about it. Feedback from you is an important way for me to know what works and what needs clarification.

Make Snake Charmer’s Duck Call


Important Update

I got a really interesting comment on the YouTube Talk Box instructional video from Tony Carl.

"I found that wrapping a garbage bag wire tie around the base of the reed makes it easier to adjust the reed opening. Just lightly squeeze the wire at the top and bottom close the opening a little or at the sides to open a little. A piece of tape wrapped around the wire to keep the ends of the wire from puncturing the balloon :)"

Tony based this innovation on the construction of crumhorn and bassoon reeds.
I found the twisty technique to be very helpful and I think it will help other people having trouble adjusting the reeds. Even sliding the wire a little forward or backward on the straw had an adjusting effect. If I squeeze it too hard shut, I can also push a pencil in to open it a little (in addition to squeezing the sides, as Tony recommends).

Short Summary of the Instructional Video

Introduction

The instructional video starts with an introduction about how I got interested in reed instruments when I was living in Bangladesh, country in South Asia. This is a great project to make with groups of kids. It only takes a straw and scissors; a hole punch--and earplugs--are optional. I named various reed instruments, but I make the case that even our vocal chords act like reed instruments: rushing air causes them to vibrate and create sound. You can feel it when you talk and touch your throat

Flattening the end of the Straw

The first step in the instructions is to flatten the end of a straw with your teeth. It can be a little challenging when you don't have front teeth! But do the best you can.

Cutting the flaps

Then you cut small flaps on the end of the straw. They should be close but not touching.

Testing

It's time to test out the reeds. You have to get the reeds in past your lips and teeth so they are free to vibrate. Also, you can't crush the straw or the air will not be able to get through. Then blow through the instrument. It is also possible to draw air in the other end and actually see and feel the reeds moving. You can get some change in pitch by blowing harder or softer, but to get enough range to play a tune you have to modify the insrument.

Changing Pitch

 There is a funny demonstration where you cut the straw shorter and it keeps getting higher in pitch. And the easiest way to get enough pitch range to play a tune is use another straw to make a slide--like a trombone. The other way is make finger holes with a paper punch.

Experimenting

There are some other things you can do with your reed instrument. You can get low notes from it by taping on more straws so it's longer. You can even make it "talk," sort of. After all, we create vibration in our throats, then modify the sound by what we do with our mouths. You can kind of do that with with your reed instrument and your hands.

Thanks to the West Branch School and YMCA after school program.