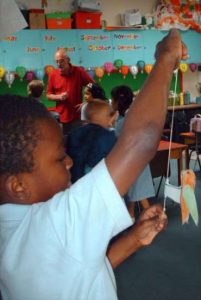
Ruth in the UK sent some pictures of her students making and using the woodpecker project.
What you need:
- 1/4" (6mm)OD clear PVC tubing plastic or drinking straw.
The clear 1/4"(6mm) tubing is available from any hardware store. It is sold by the foot off rolls. You only need 1" per bird, but get a couple of feet to make a curvy, loopy drinking straw (like a "Krazy Straw"). It is food grade. You can substitute a rigid plastic drinking straw. The thin kind school cafeterias always seem to have are the best. - thin rubber bands
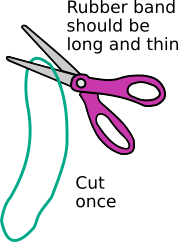
How thin the rubber band is determines--more than anything else--how well the project works. If you are using a rubber band assortment, use the thinnest ones. - white poster board, scissors, tape
The poster board is about as thick as cereal box cardboard. Cereal boxes are one of my favorite things to recycle, but for this little bit use white poster board, which takes coloring well.
Assembly
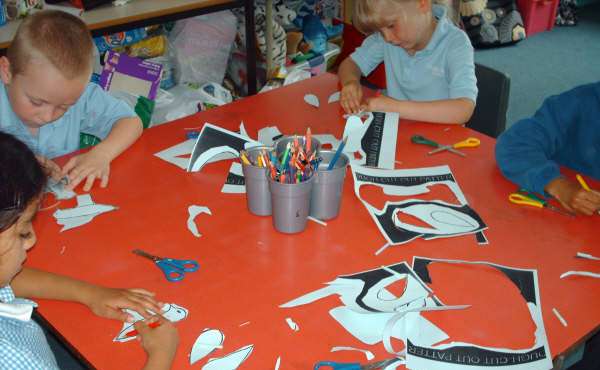
step1: Print the pattern, cut out the body and wings.
- Print out the pattern. Some browsers and PDF viewers change the scale and the size of the printed pattern. Choose the print options that say something like "Actual Size" or "Scale: 100%." Also, the printout has a scale check. It says 2" line to line or 5 cm line to line. Make sure it's accurate.
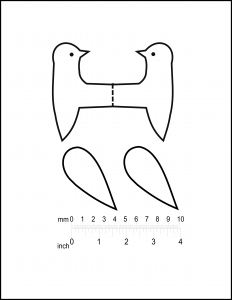
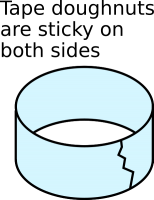
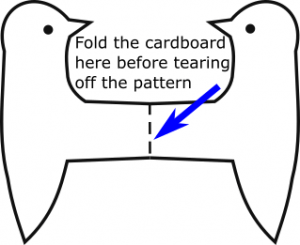
- Rough-cut out the body and wings. Use tape doughnuts to stick the patterns to the cardboard. Fine cut the pattern of the body and wings. Tear the pattern paper off the three cardboard pieces, but first bend the cardboard a little on the line between the two halves of the bird.

- Use tape doughnuts to stick the patterns to the cardboard.
- Fine cut the pattern of the body and wings.(Cut along the outline)
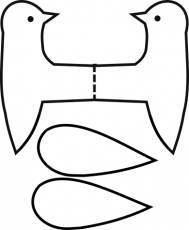
- Tear the pattern paper off the three cardboard pieces, but first bend the cardboard a little on the line between the two halves of the bird.
Step 2: Cut a 1" piece of tubing or straw, tape
Tape the straw securely into the fold in between the bird halves. The same amount of straw should stick out the top as the bottom. Use three pieces of tape on top of each other to really hold it on.

Step 3: Finish assembly and try it out.
- Use a tape doughnut to hold the two halves of the body together, and to attach the wings.
- Cut the thinnest rubber band you can find and thread it through the straw.
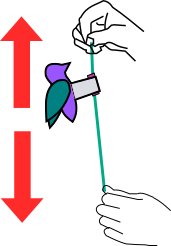
- To make it go, get the woodpecker toward the end of the rubber band that the head points to.
- Stretch the rubber band vertically. Make sure your hand is not near your eye, so the rubber band will not snap your eye if it breaks.
- Shake your hands up and down a few times, then suddenly hold them still. The bird should keep on bobbing... and bobbing...and bobbing all the way down until its potential energy is exhausted.
Note: If the wookpecker won't work...
...you can experiment with making the diameter of the straw smaller.
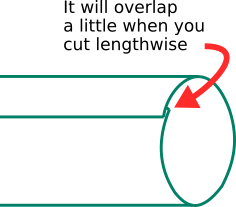
How To make the diameter smaller
- Slice the piece of straw lengthwise.

The cut edges will overlap a little, decreasing the diameter.
- Squeeze the straw a little bit so the edges overlap, as shown at right. Tape so it stays overlapped as much as you want it.

I'd like to know how this project goes for you. I'm happy to answer questions about it. Feedback from you is an important way for me to know what works and what needs clarification.