How to Make Periscopes with Plastic Mirror

What You Need:

  • Mirror
    First, figure out about how much you'll need. How many kids will make the project? With no waste, each square foot of mirror will provide enough material for 20 projects. Allow for some waste. The plastic mirror must be cut into 1 1/2" wide strips. The company that sells you the mirror is likely to be able to do that for you.
    In the yellow pages of your phone book, look under "mirror" or "glass." Try to find the company that replaces most of the window glass in your area. They will also sell mirror, and probably acrylic (plastic) mirror.
    You might want to mention that you need the mirror for an educational science project for kids before mentioning that it must be cut up into 1 1/2" wide strips.
  • Cardboard
    Each project will need about an 8 1/2" by 11" piece of poster board or cereal box cardboard.
  • Other
    Hacksaw, scissors, ruler (or other straight edge, or a sharp corner to fold cardboard with) and tape.
  • Sawing jig
    Although the sawing jig is optional, it is especially useful if you are working with a group.It only takes 5 minutes to make and you just need one for a group. You need 5 nails about 1" to 2" long and a piece of wood at least a foot long. A 2 by 4, furring strip or virtually any other flat piece of wood will work. Any place where building construction is going on will likely give you a piece of scrap 2 by 4.
  • Patterns

Step 1: Make the sawing jig (make it ahead of time if you are working with a group).

The 1 11/2" strips of mirror need to be cut to 2" long pieces. You might think you would be doing kids a favor by cutting the rectangles from the strip ahead of time, but I believe that when the kids help cut, it adds a great deal to the project. You will be holding the other end of the saw and helping to guide it (see step 2). Unlike some kinds of saws, hack saws are pretty safe. The jig makes the cutting fast and easy. It also keeps hands away from the saw.

  1. Print out the nail pattern for the jig. Some browsers and PDF viewers change the scale and the size of the printed pattern. Choose the print options that say something like "Actual Size" or "Scale: 100%." Also, the printout has a scale check. It says 2" line to line or 5 cm line to line. Make sure it's accurate.
  2. Line up the indicated edge with the end of your board and tape it down.
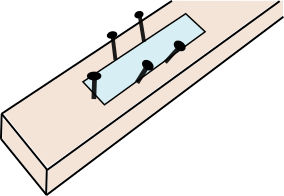
  3. Pound in the 5 nails where indicated.
  4. Bend the nails outward slightly so it is easy to get the mirror in and out.
  5. Cover the nail heads with some tape so they don't hurt anyone. The illustration shows a strip of mirror in the jig.
Step 2: Cut the mirror

I help a few kids at a time while most of the kids are working on steps 3 and 4.

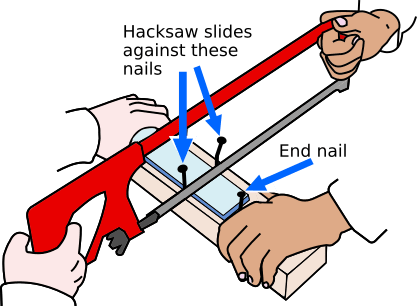
  1. Slide a mirror strip in the jig until it hits the end nail.
  2. Both you and the kid will hold the hack saw with one hand and the jig with the other hand, as shown. Let the kid hold the hack saw handle while you hold the frame on the other end.
  3. Slide the hack saw blade against the pair or nails closest to the end nail, which will cut the mirror to about 2" long.
Step 3: Cut out the periscope body and the triangle mounts.

  1. Go here and print out the body pattern. Some browsers and PDF viewers change the scale and the size of the printed pattern. Choose the print options that say something like "Actual Size" or "Scale: 100%." Also, the printout has a scale check. It says 2" line to line or 5 cm line to line. Make sure it's accurate.
  2. Rough cut (bubble cut) around the solid lines.
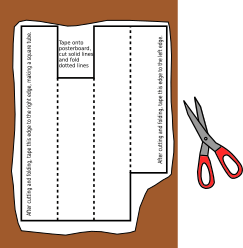
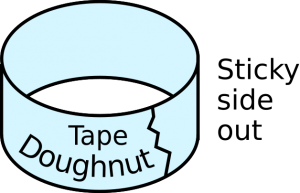
  1. Stick 4 tape "doughnuts" to the corners of the non-print side.
  2. Tape it onto the cardboard and cut out on the solid lines. Keep the pattern taped on until you have folded on the dashed lines (step 4).
  1. Go here and print out the pattern for the triangle mounts. Some browsers and PDF viewers change the scale and the size of the printed pattern. Choose the print options that say something like "Actual Size" or "Scale: 100%." Also, the printout has a scale check. It says 2" line to line or 5 cm line to line. Make sure it's accurate. When formed into the said triangles, they will hold the mirrors in the periscope at just the right angle.
  1. Once again, rough cut them out and stick them onto cardboard using tape doughnuts.
  2. Cut out on the solid lines. Don't tear off the pattern until it is folded (next step).
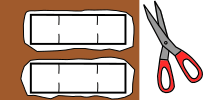
Step 4: Fold and tape

  1. Fold the periscope body on the dashed lines. Do it with a straight edge or even on the sharp edge of a desk. Kids have a hard time applying enough pressure to make the fold while at same time trying to be accurate and stay on the dashed line. For that reason, I encourage the kids to help each other out in pairs for this operation. Four hands are better than two.
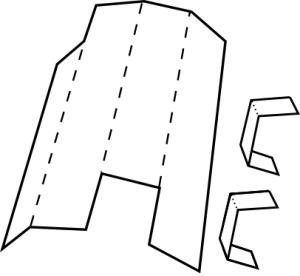
  1. When folded, the body will start look like a rectangular tube. When you're satisfied of the folding job, tear off the pattern and tape the edges together.
  2. Similarly, fold the triangle mounts on their dashed lines and they will actually start to look like triangles. Tape one end to the other end.

Step 5  Tape the mirrors to the mounts, and the mounts to the periscope.


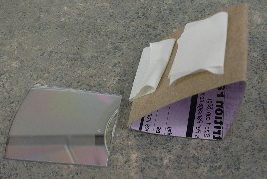
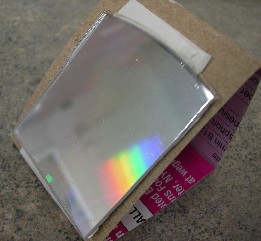
The mirrors have to be taped to the hypotenuse of the triangle. This is the longer side opposite the taped ends. The triangles are right triangles (have a 90 degree angle), isosceles (have 2 sides of equal length) and they have two 45 degree angles.

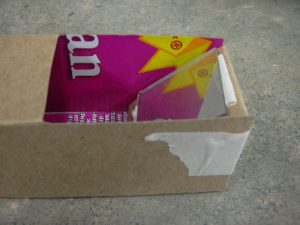
On one of the other sides of triangles, stick on a tape doughnut. Push that side of the triangle into the periscope so it sticks on the inside wall. Look carefully to see how it goes in. Put a piece of tape on the bottom to further secure it in place. Of course, this has to be done with the other triangle on the other end as well.

You might have to do some adjusting to get the mirrors to line up, but it's pretty intuitive.

I'd like to know how this project goes for you. I'm happy to answer questions about it. Feedback from you is an important way for me to know what works and what needs clarification.

Further Explorations of the Periscope and Mirrors

The dyslexia machine

I encountered a very clever device in a museum that was said to bestow users with a sense of what it was like to be dyslexic. You had to try to write your name in front of a mirror so that the reflection of the letters looked right. It is extremely frustrating.

Try it with a regular mirror. Hold a pad of paper right up to a mirror and write so that the letters read normally in the mirror. The periscope does allow you to read normally because the second mirror un-does what the first mirror did.

Did You Know?

Did you know that when you look in a mirror, you don't see yourself as others see you? The left and the right of you are reversed. So why doesn't the mirror reverse up and down? I don't know myself.

Other sites with periscopes and mirrors

How to make a periscope with CD or DVD

The instructions below are for a design of periscope made from poster board or cereal box for the body, and the mirrors are cut from ordinary CDs or DVDs. If you are going to be making lots and lots of periscopes, I have another set of instructions that use plastic mirror here. Also, the Exploratorium has a design of periscope that uses a milk carton and small cosmetic mirrors here.

Step 1    Cut the mirror

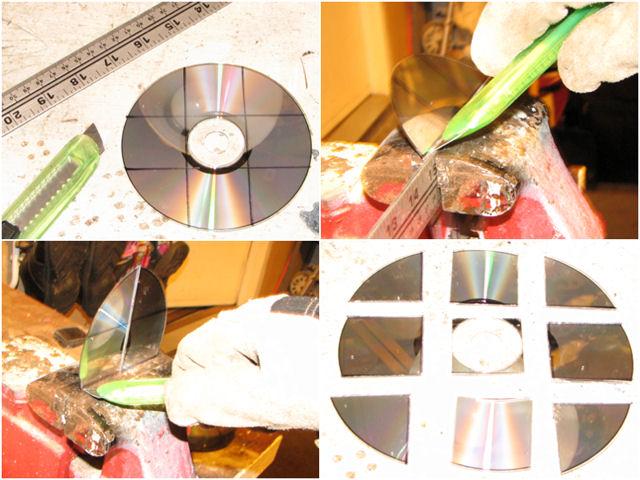
We can thank Shannon of Victoria BC, Canada for the idea of using ordinary CDs for the two mirrors. You can cut the CDs two ways: the proper way is with a vice as shown by pictures sent by Shannon. She wrote, "Pictures of the process for cutting CD's is below. Each CD makes four mirrors. Just keep bending the CD slightly as scoring and it will cut/break clean pretty quickly." If you forget to keep scoring as you bend, the CD will shatter and ruin the reflective surface.

If you don't have a vice, or if you are lazy like me, you might be able to just cut them with a high-quality pair of scissors. When I first tried it, some of the CDs would shatter, but then yet another Canadian, Heather Dickey of Ontario, (who made the periscope project with here cub scouts) wrote in that warming the CD up first with a hairdryer eliminated the shattering problem--and it worked! And then I found that heating them in warm water works too. From this I deduce that heating many materials makes them less brittle and there must be lots of intelligent, creative women live in Canada!

Step 2: Cut out the periscope body and the triangle mounts.

  1. Go here and print out the body pattern. Some browsers and PDF viewers change the scale and the size of the printed pattern. Choose the print options that say something like "Actual Size" or "Scale: 100%." Also, the printout has a scale check. It says 2" line to line or 5 cm line to line. Make sure it's accurate.
  2. Rough cut (bubble cut) around the solid lines.

  1. Stick 4 tape "doughnuts" to the corners of the non-print side.
  2. Tape it onto the cardboard and cut out on the solid lines. Keep the pattern taped on until you have folded on the dashed lines (step 4).

  1. Go here and print out the pattern for the triangle mounts. Some browsers and PDF viewers change the scale and the size of the printed pattern. Choose the print options that say something like "Actual Size" or "Scale: 100%." Also, the printout has a scale check. It says 2" line to line or 5 cm line to line. Make sure it's accurate. When formed into the said triangles, they will hold the mirrors in the periscope at just the right angle.
  1. Once again, rough cut them out and stick them onto cardboard using tape doughnuts.
  2. Cut out on the solid lines. Don't tear off the pattern until it is folded (next step).

Step 3: Fold and tape

  1. Fold the periscope body on the dashed lines. Do it with a straight edge or even on the sharp edge of a desk. Kids have a hard time applying enough pressure to make the fold while at same time trying to be accurate and stay on the dashed line. For that reason, I encourage the kids to help each other out in pairs for this operation. Four hands are better than two.

  1. When folded, the body will start look like a rectangular tube. When you're satisfied of the folding job, tear off the pattern and tape the edges together.
  2. Similarly, fold the triangle mounts on their dashed lines and they will actually start to look like triangles. Tape one end to the other end.

Step 4  Tape the mirrors to the mounts, and the mounts to the periscope.
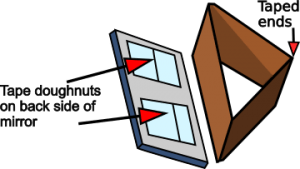
    

The mirrors have to be taped to the hypotenuse of the triangle. This is the longer side opposite the taped ends. The triangles are right triangles (have a 90 degree angle), isosceles (have 2 sides of equal length) and they have two 45 degree angles.
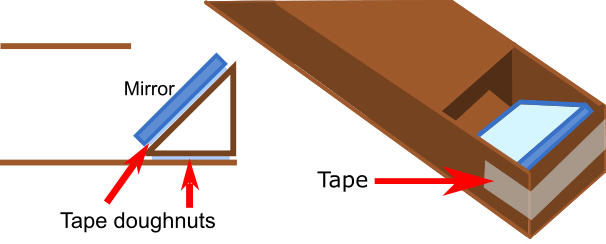
On one of the other sides of triangles, stick on a tape doughnut. Push that side of the triangle into the periscope so it sticks on the inside wall. Look carefully to see how it goes in. Put a piece of tape on the bottom to further secure it in place. Of course, this has to be done with the other triangle on the other end as well.

You might have to do some adjusting to get the mirrors to line up, but it's pretty intuitive.

I'd like to know how this project goes for you. I'm happy to answer questions about it. Feedback from you is an important way for me to know what works and what needs clarification.

The Periscope

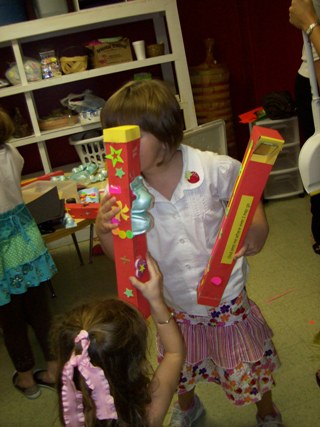
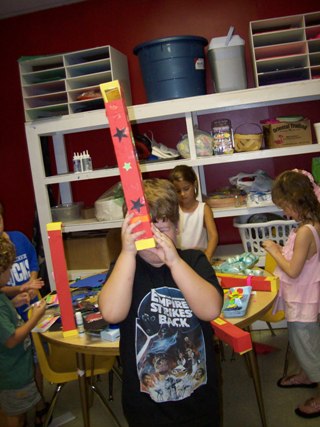
Creative woman named Ann Davis of Oakman, Alabama used poster board and made the periscopes much longer. Furthermore, she adapted it to a theme in her Bible craft class. Each periscope has the words, "God sees me where ever I may go." She reports that the 20 kids in her class (!) loved making it. Ann added an end cap to cover the raw edges and a gluing flap along one edge to make it steady. She found the triangle pattern helpful for helping cut through the confusion of how to set the mirrors.

Frank Oppenheimeer, the physicist and founder of the Exploratorium science museum in San Francisco, was fascinated by mirrors. He was very influential in making science exhibits fun and interactive. Many of his exhibits used mirrors.

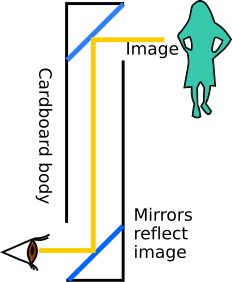
Periscopes use mirrors to see around corners.  This instructions here are particularly good for making them with large groups inexpensively. You will use Plexiglas(which is actually plastic) mirror. This instructions, on the other hand, use mirror made out of old CDs or DVDs (thanks to a tip from a Canadian reader).

Another reason I mentioned the Exploratorium at the top of this page is that they also have a good periscope design using a milk carton for the body. Check out their design and compare it with my design and see which will work best for you.The Exploratorium design is more expensive to build but gives you a wider field of vision. Here you can watch somebody using the Exploratorium periscope.

Super Sylvia and her family (of Make Magazine) have terrific periscope instructions, too. They have done the best at incorporating math concepts into the construction.

This is the the e-mail I recieved from David Baxendell about a durable periscope made from roofing downspout and connectors.

Hi Slater,
I enjoyed your site and came away with a few ideas, although I need to adapt somewhat as I am a teacher of 3-4 yr. olds. I am passionate about introducing children to science concepts as early as possible and have been making and demonstrating with them for 25 years. I came up with the following idea for a periscope while trying to find something sturdy enough for constant unsupervised use with them (as all my demonstration equipment has to be!) Let them play with it for a while and then field the questions.

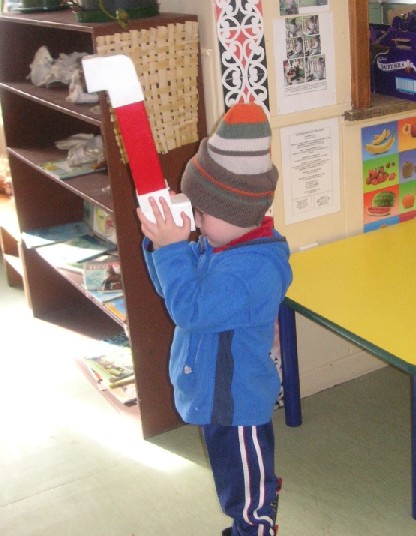
Young Jacob demonstrates the durable periscope in its busy museum environment.
  • 1 length of rectangular section downpipe.
  • 2 right angle connectors for above.
  • 2 45 degree triangular wooden blocks to fit in the connectors

I used hot melt glue to attach mirrors to wooden blocks, then drilled and screwed the blocks inside the connectors and attached them to the ends of the pipe facing opposite directions. The connectors are a tight fit and I secured them with a single self-tapping screw to allow easy repair work while preventing children from dismembering the item and leaving the various parts scattered in different areas (if it *can* happen, it *will*, eventually!)

I spiced up the main body with an odd piece of self-adhesive book covering. I created this during a session with children helping me and often take it apart to show them how it is made. Attached is a photo of it in use (a bit out of focus, sorry). This one has had about 10 years of hard use and still going strong.

Keep up the good work

David Baxendell
Christchurch

I'd like to know how this project goes for you. I'm happy to answer questions about it. Feedback from you is an important way for me to know what works and what needs clarification.