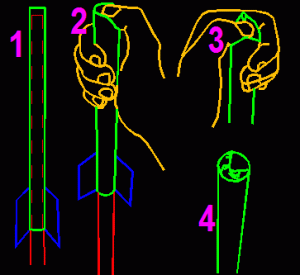
Illya Quandt of Nevada
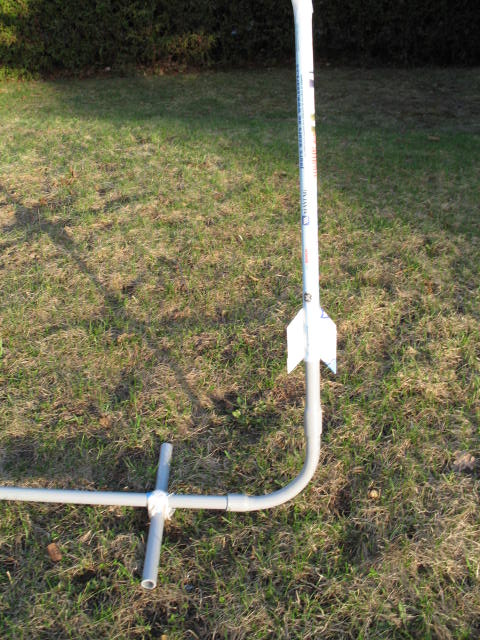
Illya Quandt of Nevada developed an air rocket variation which is an alternative to the short, lashed-on legs that keep the rocket pointed into the sky. He makes legs from plastic pipe that is one size larger than the 1/2" pipe that actually conveys the air from the bottle to the rocket. Here is a picture, and if you want to know more about it, go to the bottom of this page. I have not tried it yet, but if it works for me I might rewrite the directions.
Guy Migneron of Canada
A launcher and rocket ready to fly, by Guy Migneron of Canada. 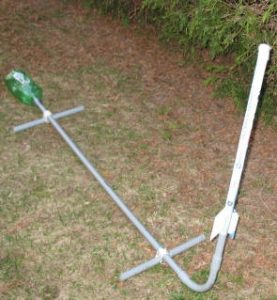 As an alternative to white plumbing pipe Guy used 1/2" PVC electrical "conduit" pipe, which is usully gray and usually used to contain electrical wiring. As you can see from the picture above, an added bonus is that the 90 degree elbow has a more gentle curve. This probably results in less friction as the air rushes through the tube. You find it in the electrical section rather than the plumbing section.
Phil Weglarz
Phil Weglarz sent in a clever rocket variation with a parachute. He says, "Adding an inverted bottle cap to the tip allows the rocket to carry a payload with parachute, which deploys on its own on the way down. I used the standard army guy with chute and glued him onto a piece of cork that fits in the bottle cap. (here's a close-up of our "pilot" on the launch pad) " I have also made parachutes that attach directly to the rocket.(1:03 or so, among other science exhibits).
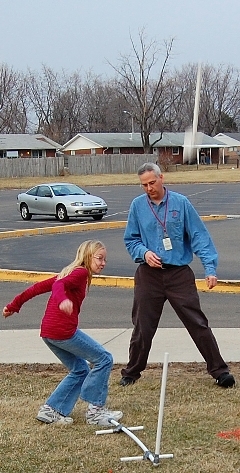
We had to dumb-down the launchers because the rockets were hitting the gym ceiling so hard that I was afraid they would make holes!.
More about Illya Quandt's Rocket Launcher Leg Design
Here is the picture: And here is a closer view of that picture. Notice the 1/2" pipe actually goes through the 3/4" cross intact. There is no need to block off the air from escaping. And here is just the legs.
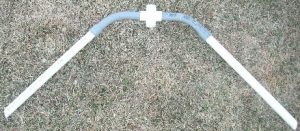
And here is Illya's explanation:
This looks like a very smart design--I'd like to try it myself when I have some time.

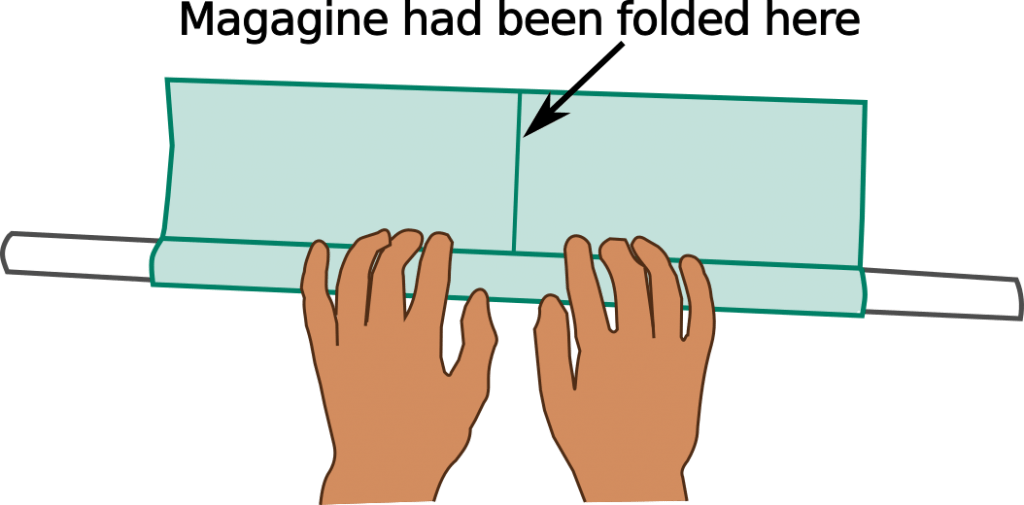

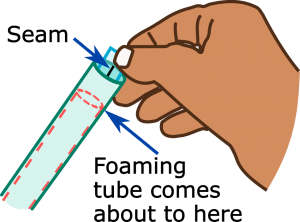 The solution is easy. Slide the rocket body so that about half an inch is beyond the end of the forming tube (shown as a pink dashed "hidden" line in the illustration). Now you can see the end of the inside seam (black in the illustration). With a piece of tape (light blue) about an inch long, stick about half on the inside seam and fold the rest over to stick on the outside. When you put fins on the rocket next step, put them on this end.
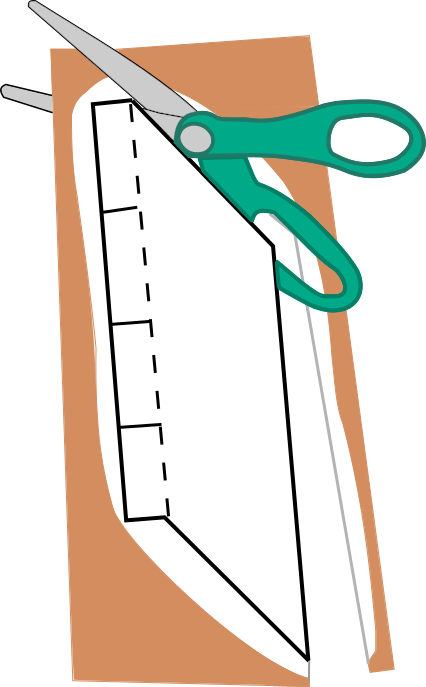
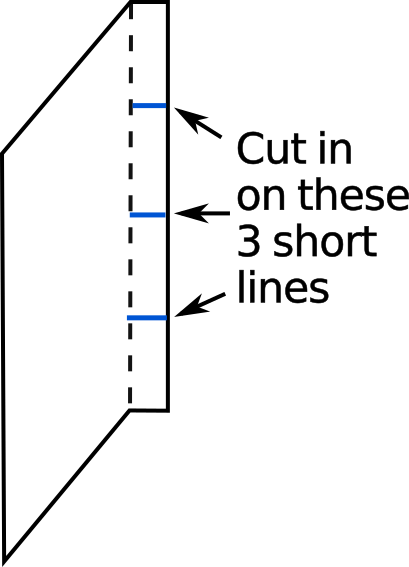
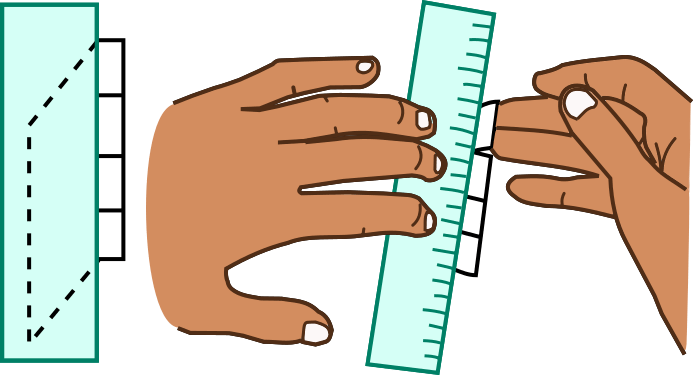 When the cutting is done, fold on the dashed line. You can do this by putting a straight-edge exactly on top of the dashed line and pulling the tabs up, as shown in the illustration. Or line up the dashed line with a sharp corner and bend it.
 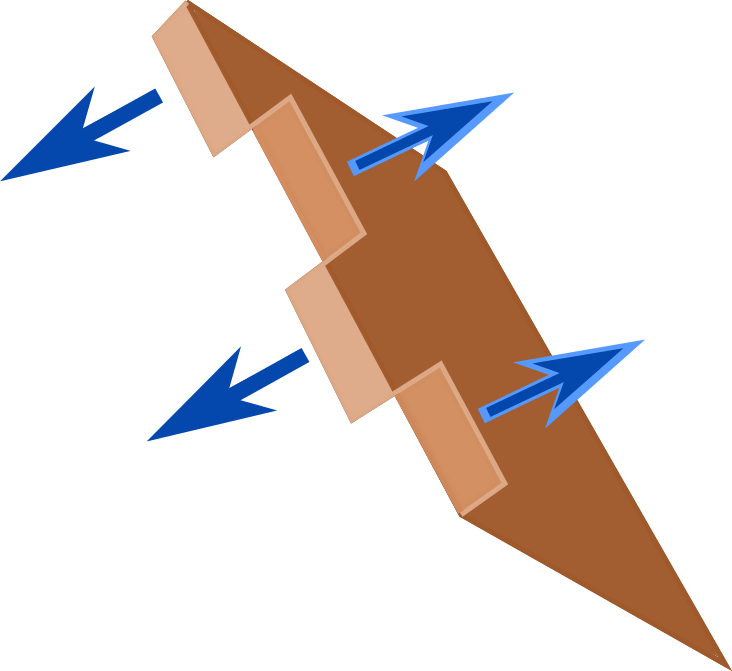 Next bend two of the tabs the other way so they alternate in direction. These bent tabs --known as "flanges"-- will allow you to tape the fin on each side to the body, so it will be stronger.
 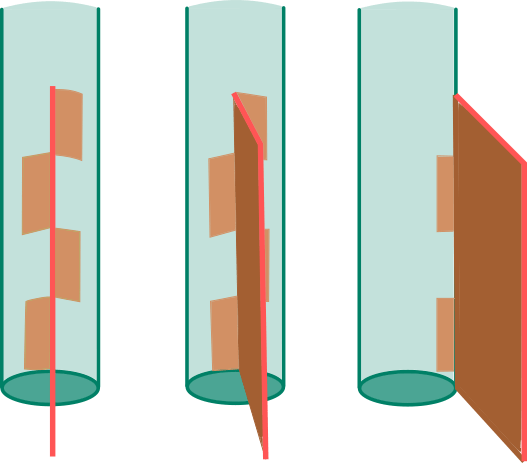 Finally, tape the fins onto the end of the rocket tube -- the end that you taped at the end of step 1. Line up the fin with the end of the rocket, as shown in the illustration. Actually, it's three illustrations of the rocket being rotated clockwise to show the fin from several angles. The outer edge of the otherwise brown fin is pink, as a reference point.
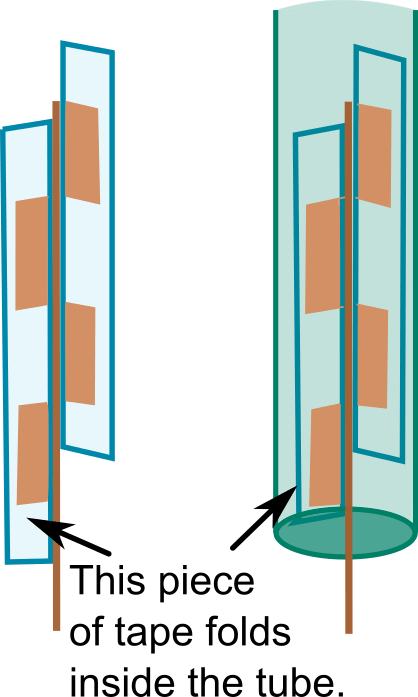 Use two pieces of tape about 3" long-- one on each side of the fin. Notice in the other illustrations on the right that the tape (the outline of it shown as light blue) extends above and below the flanges. The tape end for the lowest flange will fold right into the inside of the tube. Press the tape on hard.Tape on the other fin on the opposite side.
 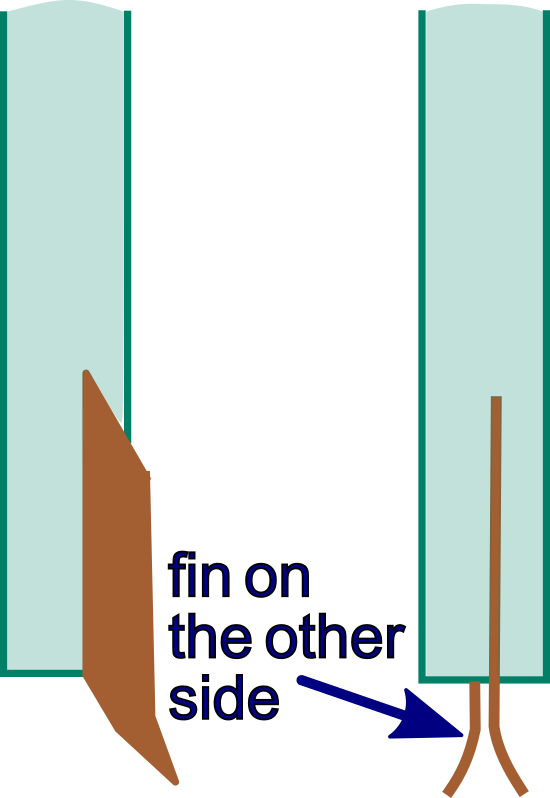 Finally, bending the bottom of the fins a bit will make the rocket spin, making it more flight stable. The illustrations omit the flanges to concentrate on the bends. Notice that when viewing the close fin edgewise, the other fin appears to be bending the other way. But if you turn the rocket tube so the far fin in now close, the bend is going the same way as the other fin was.
 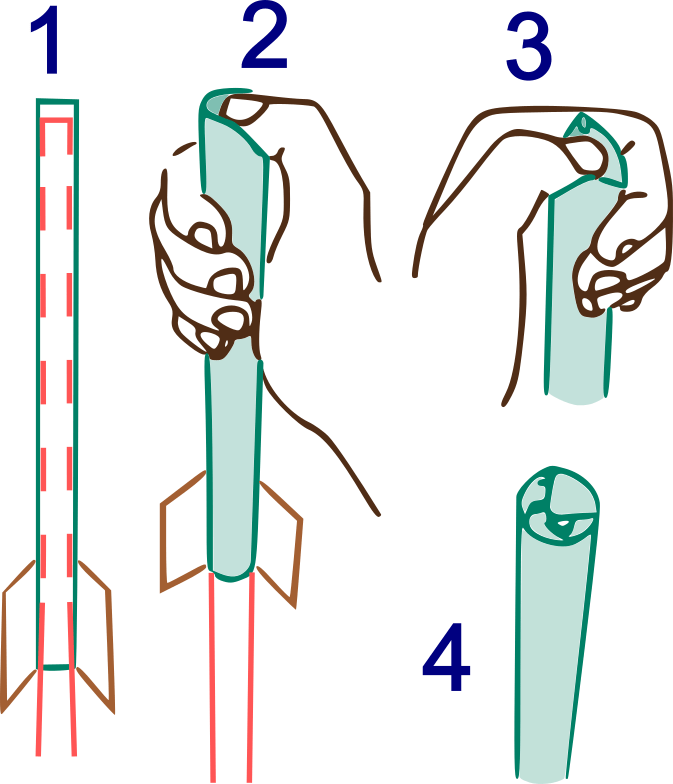 Start by sliding the rocket to the other end of the forming tube so that 1/2" of the paper tube sticks out past.
 Tear off a piece of clear plastic food wrap about 6" or so long and crumple it up. With a piece of tape about 4" long, tape the ball of plastic (yellow in the illustrations) to the top of the rocket, as shown. The tape (blue in the illustration) will form an upside down"U" with the middle curving around the top of the crumpled ball and the ends taped to the rocket tube. Apply another piece of tape perpendicular to the first. It might not be a perfect dome, but it is an approximation.
 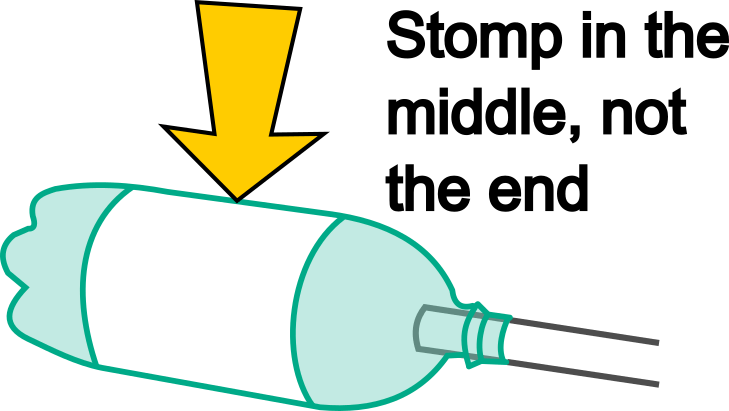 To launch a rocket slide it onto the vertical pipe-- all the way down. When everyone is clear, count down and stomp really hard on the middle of the soda bottle with one foot. Do not stomp on the end of the soda bottle because that will crack the bottle.
 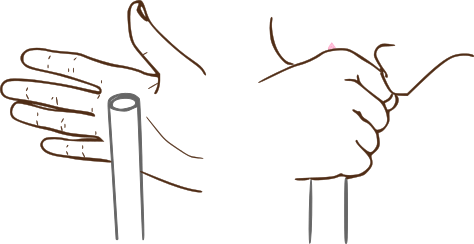 You'll need to blow up the bottle again before sliding the rocket onto the launcher for another launch. The only place you can do that is the opening at the top of the vertical pipe. Rather than put your your mouth directly on the pipe, make a fist around it and blow into your fist. You can make an air-tight seal. If people don't stomp on the end of the soda bottle it can easily last over 50 launches before needing to be replaced. You'll know when it finally does need to be replaced. Either it will be cracked so you won't be able to re-inflate the bottle, or it will be so crinkled that it won't inflate all the way. For
 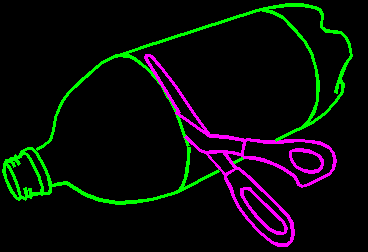 Cut off the spout end of the bottle as shown. The razor can be helpful for starting the cut. Putting on a lid tightly helps keep the bottle from collapsing as you start the slice. If using a knife, be careful that it doesn't glance off as you start the cut.
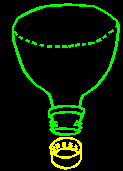 If you haven't already put on a bottle cap, twist one on now. Have the pipe and water ready to go. Read through step 2 and step 3 so you know what to do once the bottle cap is melted.
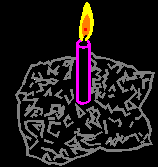 Light the candle. The air around the candle must be still or it will be difficult to direct the heat where you need it the most.
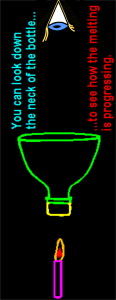 Viewing from the top, look for changes in appearance in the bottle cap. First you will concentrate on directing to the middle of the cap, not lopsided to one side. Then you'll be looking for the signs that it's melted enough to form, but not so hot it melts a hole in the cap.
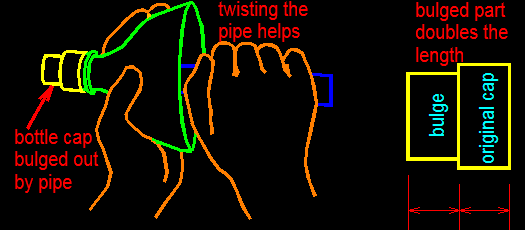 Push the pipe into and through the neck of the bottle. Twisting the pipe slightly as it goes in helps control the motion. It will push against the soft spot on the cap and bulge it out to be about twice as long as the original bottle cap. The neck will keep the pipe perfectly centered. Interestingly, the bulge will hug the pipe and take its shape.
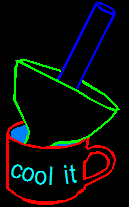 Quickly cool the bottle cap by dunking it in water. The plastic that forms the side of the bulge might seem a bit thin, but that's ok.
 Pull the pipe back out. Twisting might help again. Un-screw the lid off the bottle. Cut the end off the bulge. I think the easiest way to start the cut is by cutting off the corner formed by the end and the side, so you're actually cutting through 2 layers at once.
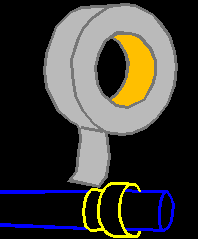


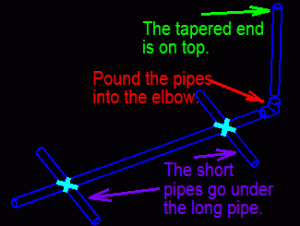
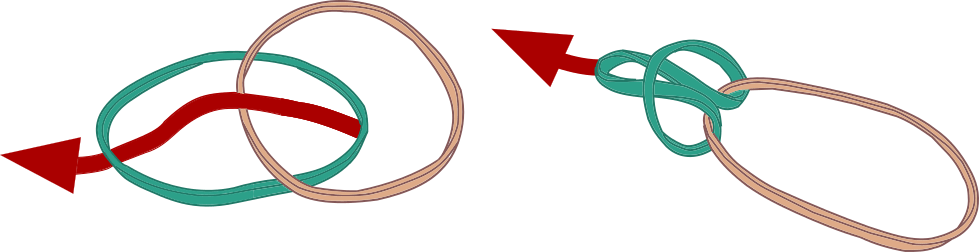 Start by making a chain of rubber bands about 16" long, un-stretched. Link the rubber bands as per the illustration.You can't lash very tightly with rubber bands, but rubber has a very high coefficient of friction. That means it is the opposite of slippery.
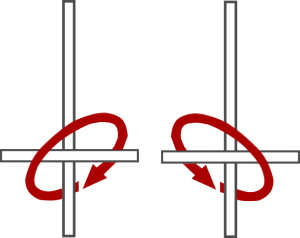 Make a cross with one of the 1' short pipes and the 4' long pipe, about 6" from the end of the long pipe. Hook the end rubber band around a pipe. Wrap the rubber band chain around the intersection in the two ways shown in the illustration, stretching it a little as you wrap. When you get it almost all wrapped on, hook the other end rubber band around a pipe again to keep it from unwrapping.
 Next comes the wrapping of clear plastic food wrap. Cut off about a 5' piece and squeeze it to make it thin--more like a rope than a sheet. Tie a small loop in one end as shown. Hook the hoop around one of the pipe ends.
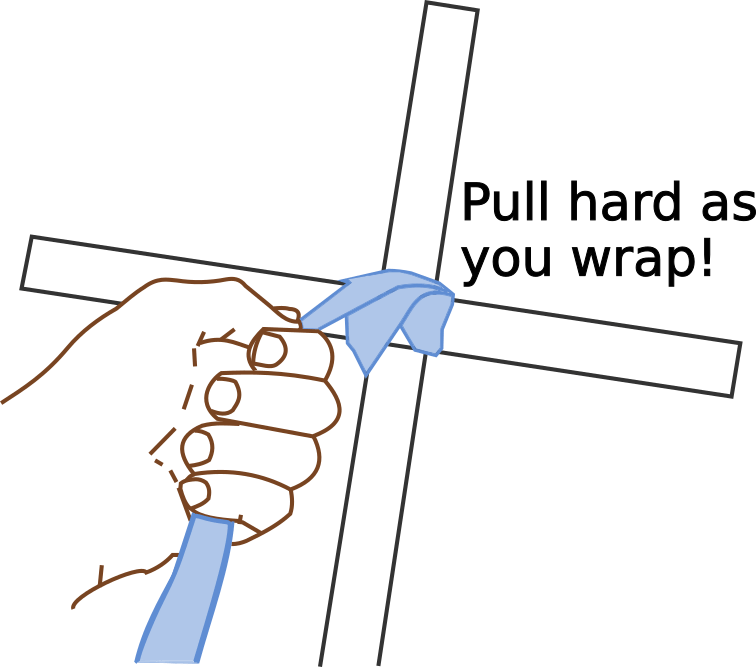
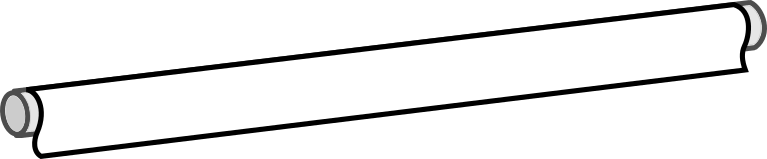
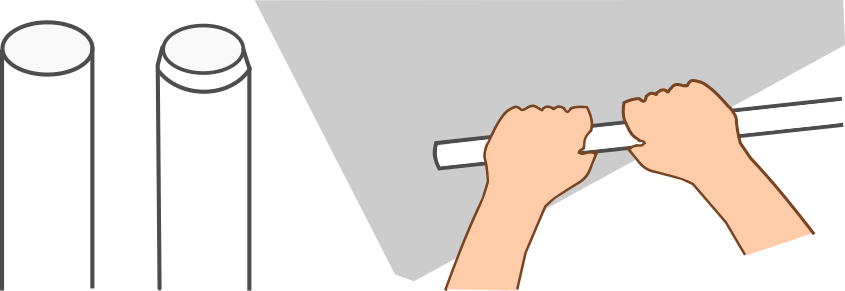 Tapering the outside of one end of the 2' vertical pipe makes it much easier to get the rockets on. I suppose the proper way to do it is with a file, but I find it's very easy to rub the pipe end on a concrete sidewalk (the gray, square thing shown in the illustration). Pulling the pipe while rotating it at the same time makes a smooth taper
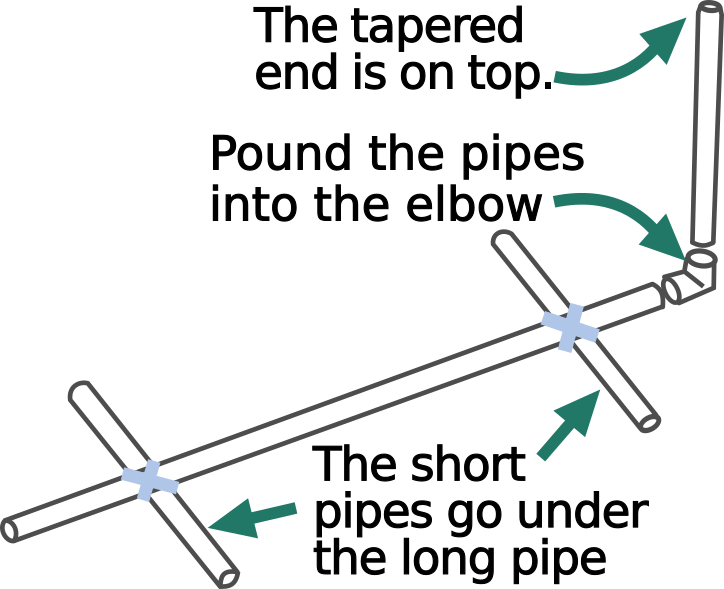
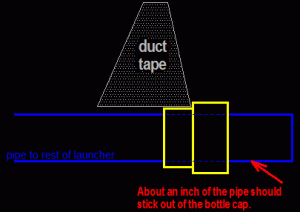
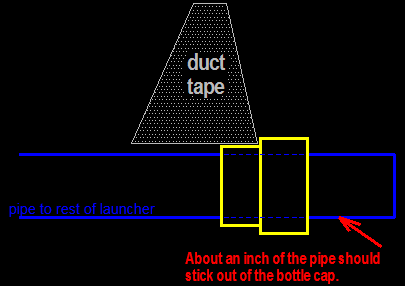
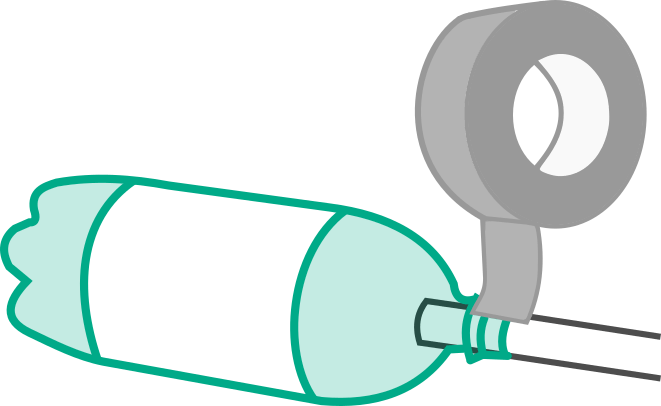 On the pipe end opposite from the elbow, tape on a 2-liter soda bottle using wide tape. Although the bottle can be stomped 50 or more times, eventually it will have to be replaced.
 For that reason, it's a good idea to stick a little bit of the end back onto itself. This creates a no-stick tab that makes it easier to un-wrap the tape.