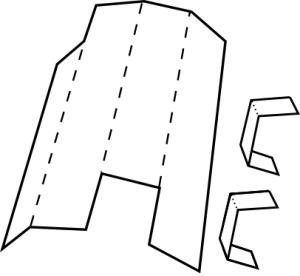
The instructions below are for a design of periscope made from poster board or cereal box for the body, and the mirrors are cut from ordinary CDs or DVDs. If you are going to be making lots and lots of periscopes, I have another set of instructions that use plastic mirror here. Also, the Exploratorium has a design of periscope that uses a milk carton and small cosmetic mirrors here.
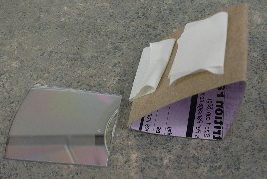
Step 1 Cut the mirror
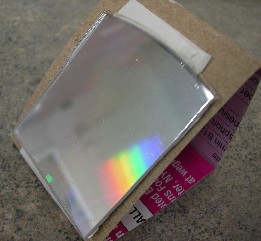
We can thank Shannon of Victoria BC, Canada for the idea of using ordinary CDs for the two mirrors. You can cut the CDs two ways: the proper way is with a vice as shown by pictures sent by Shannon. She wrote, "Pictures of the process for cutting CD's is below. Each CD makes four mirrors. Just keep bending the CD slightly as scoring and it will cut/break clean pretty quickly." If you forget to keep scoring as you bend, the CD will shatter and ruin the reflective surface.
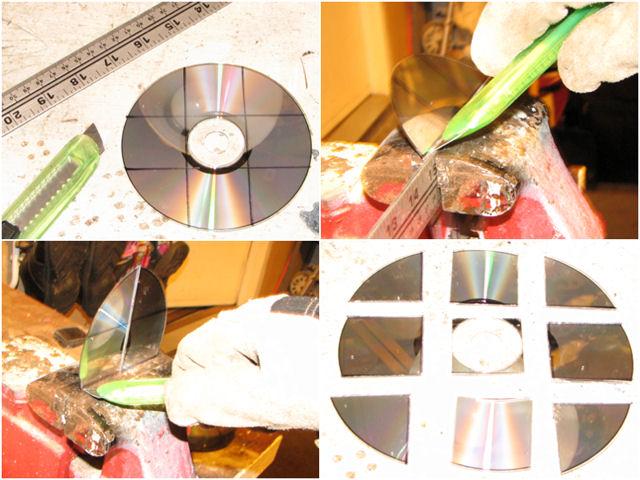
If you don't have a vice, or if you are lazy like me, you might be able to just cut them with a high-quality pair of scissors. When I first tried it, some of the CDs would shatter, but then yet another Canadian, Heather Dickey of Ontario, (who made the periscope project with here cub scouts) wrote in that warming the CD up first with a hairdryer eliminated the shattering problem--and it worked! And then I found that heating them in warm water works too. From this I deduce that heating many materials makes them less brittle and there must be lots of intelligent, creative women live in Canada!
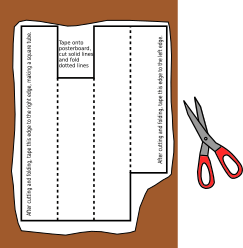
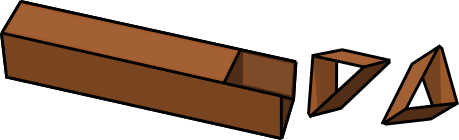
Step 4 Tape the mirrors to the mounts, and the mounts to the periscope.
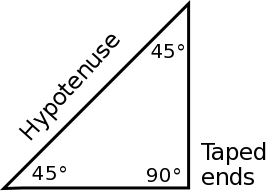

The mirrors have to be taped to the hypotenuse of the triangle. This is the longer side opposite the taped ends. The triangles are right triangles (have a 90 degree angle), isosceles (have 2 sides of equal length) and they have two 45 degree angles.

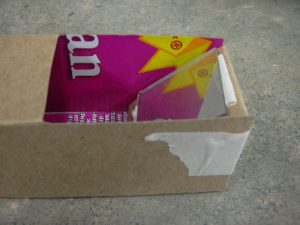
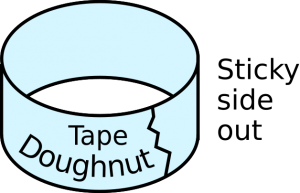
On one of the other sides of triangles, stick on a tape doughnut. Push that side of the triangle into the periscope so it sticks on the inside wall. Look carefully to see how it goes in. Put a piece of tape on the bottom to further secure it in place. Of course, this has to be done with the other triangle on the other end as well.
You might have to do some adjusting to get the mirrors to line up, but it's pretty intuitive.