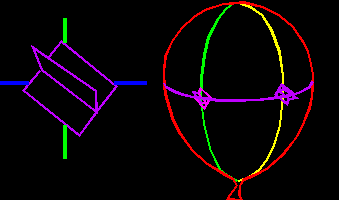
The Coanda Effect, action and reaction
The short explanation for how the balloon stays aloft goes like this, from Dr. John Denker, an aerospace researcher and author: "The balloon and hairdryer demonstrate the Coanda effect, which is a very unusual and complicated phenomenon. It requires a narrow high-speed stream of air moving through slow-moving air and striking a curved surface. This causes lots of turbulent mixing, which produces a local decrease in pressure. The low pressure pulls up on the balloon and deflects the airstream downward."
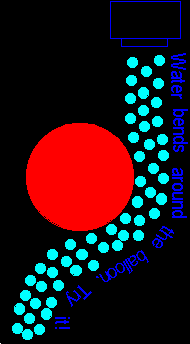
The Coanda Effect: Thin streams of liquids and gases bend around curved objects.
If you take a balloon, cup, or any round object to the kitchen sink and put the side of it under a stream of water, the water will bend around the object. This is called the Coanda effect.
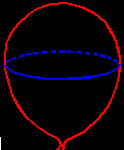
The stream of air is thrown downward
Although the Coanda Effect is easy to see with water, it also applies to thin streams of fast-moving air--such as what comes out of a hair dryer. When it gets to the curved balloon, it bends around. By the time it parts with the balloon, the air is going downward! It is important to note here that some kind of force has to be acting on the air to make it bend. Sir Isaac Newton's First Law of Motion explains that.
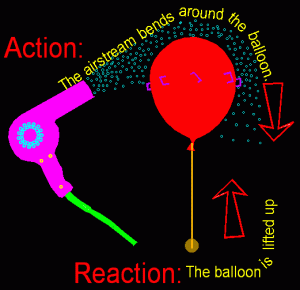
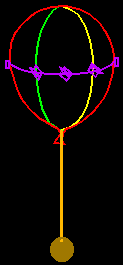
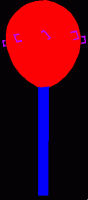
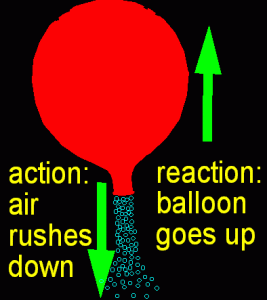
This brings us to Sir Isaac Newton's Third Law of motion, which states that for every action, there is an opposite reaction. The classic example is air rushing out of a balloon (action) and the balloon streaking ahead (reaction).
It is tempting to try to use the flight of the balloon to explain how airplanes fly, but it's a limited analogy. It is true that both explanations involve low-pressure areas, fast-moving air diverted down and reactive lift, but then they diverge. The balloon uses a thin stream of very turbulent air, while an air flowing over a wing is smooth, and air far above the wing is affected.
As Dr. John Denker cautioned, "...trying to explain how wings work in terms of the Coanda effect is like trying to explain walking in terms of bowling. Your hair drier and balloon makes a fine gee-whiz activity -- just please don't leave folks with the impression that it is a close analogy to how wings work. Bowling involves many of the same muscle groups as walking, but it is more complicated and more specialized. The jet of high-speed air coming out of the hairdryer has no analog in ordinary flight. Of course general statements about Newton's third law apply equally well to walking, bowling, wings, and balloons."
The Atomizer
Here's another neat demonstration of the Coanda effect: the atomizer. Instead of lifting a balloon, it lifts water. The air stream then nebulizes the water into a spectacular spray.
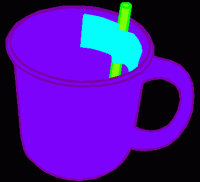
You'll need a cup, tape, a couple of straws and a suitable place. Outside is an obvious choice, but blowing the mist into a shower/bath stall or a dishwasher works too.
Start by taping a piece of straw to the inside of a dry cup with one end sticking up about 1/2" above the rim. Fill the cup full with water. If the cup is dry and you have pressed the tape on hard, it should keep sticking for awhile even under water.
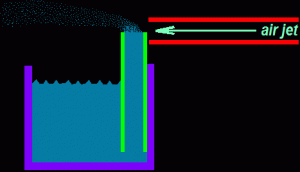
Now blow hard across the top of the vertical straw with another straw, positioned horizontally as shown in the illustration. The fast air stream creates a low-pressure area that draws the water to the top of the straw and blasts it into a spray as it comes out. This sort of thing finds a practical application in air brushes, which spray paint, and in carburetors, which mix gasoline with air for small engines.
I'd like to know how this project goes for you. I'm happy to answer questions about it. Feedback from you is an important way for me to know what works and what needs clarification.
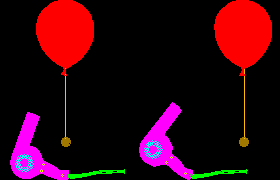
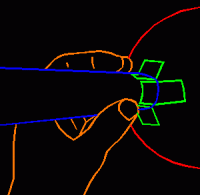
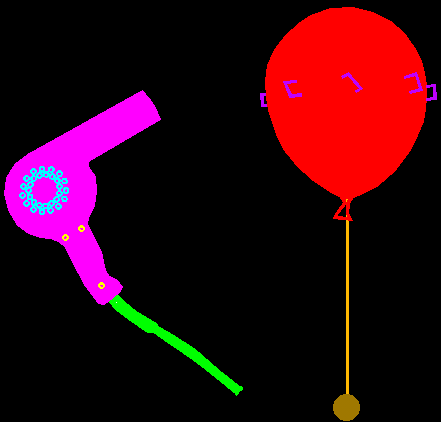
 The hairdryer has to be the kind with the long front nozzle--as shown in the picture--so the air stream is well directed. Unfortunately, this style is hard to find these days. Perhaps a store that specializes in barber supply products would have them. A vacuum cleaner hooked up the wrong way so it blows out air instead of sucking it in might work. I have not tried a leaf blower yet, but that might work.