What you need:
- at least one milk carton
- a pencil and ball-point pen
- scissors, pencil sharpener
Step 1 Cut disks from a milk carton.
- Print out the pattern on this page. Check the printed paper to make sure it did not re-scale the size of the pattern. Some browsers and PDF viewers change the scale and the size of the printed pattern. Choose the print options that say something like "Actual Size" or "Scale: 100%. Only 4 patterns of the six we want fit on a page, so if you don't want to reuse a couple of the patterns, print out the page twice. Although it is possible to make the top work with just one disk, I have the most success when using six disks. The combined mass seems to create tops that are less fickle.
- It happens that you can get six full size disks out of a milk carton. First cut the bottom off a milk carton. Cut close to the bottom because it's easier to cut with a knife and enough of the remaining carton remains to fit all the patterns on. Pull open the rest of the top of the carton. You already opened half when you opened the spout. Cut the carton lengthwise on one of the corners (it doesn't matter which) so you can open it to the inside.
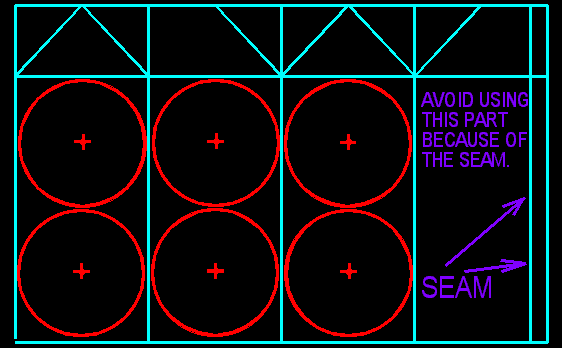
- Rough cut (bubble cut) patterns and tape them on the carton with "tape doughnuts." Don't cut disks from the side of the carton that has the seam. The seam is double layer, so it will throw the top out of balance. And don't put the pattern on a fold (the disk will be stronger without a fold). Cut out the circles, but do not remove the pattern until you have punched the holes.
Step 2 Punch holes in the disks
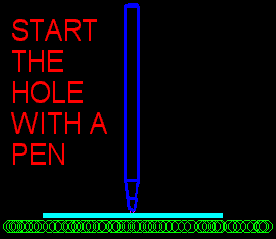
I offer this idea for punching the holes in the center of the disk, which I think is the safest way to do it: First, put on a table about 4 layers of a wash cloth, towel or anything sort of soft like that. Lay the disk on top and punch a small hole with a ball-point pen. Then pick up the disk and enlarge the hole to the diameter of a pencil by pushing and twisting the pencil in. This would have been a dangerous operation if not for the small hole. With the small hole there, our fingers can feel exactly where the pencil is coming through, and we place our hand so it goes in between our fingers. Try it, and I think you'll see what I mean even if I haven't been able to explain it in words very well. I still think that young kids should only cut the circle out and let an adult punch the holes.

Step 3 Assemble the top and try it out.
Skewer all six disks onto a long, sharpened pencil. Push the disks close together and tape them together in at least four places. Push the disks as far toward the point as you can without them falling off.
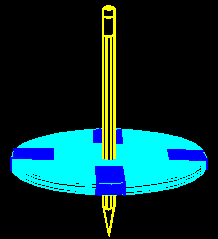
Test it on a scrap of white paper. Hold the pencil between your palms, spin and let go. It should not only spin, but also scribble little circles that will record every vibration of the top on the paper. Now experiment.

For a simple toy there are some very complex things going on. Try it with the disks pushed up more toward the top (although you are unlikely to get it to work with the disks on the upper two thirds of the pencil). A move of half an inch can make the difference between wobbling around uselessly or working. Try different sized pencils. Sometimes the top will spin. Sometimes it won't. Experiment.
Explanations and cool links related to tops and precession
