
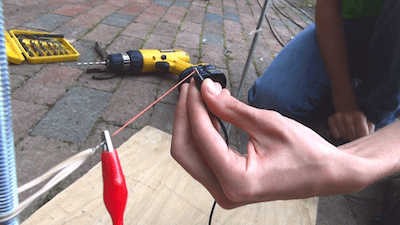
Drill two holes for the bronze “Ls” to thread into, 15cm (6”) apart, between the threaded rods as shown. Use a 3 mm (1/8”) drill. If any wood fibers stick up, scratch them off with a fingernail until it is flat around the hole so.
Unlike the rough-cutting wire where you could adjust the heat by sliding the alligator clips, you don’t adjust the heat for fine-cutting. If you are using very heavy, dense foam that cuts very slowly, you could make the bronze “Ls” closer to each other to increase heat. Or, if you want to make the wire cooler to minimize smoke when you cut—or cut a very wide piece of foam—then you can add a hole that’s farther away from the first.
Screw in the Ls until the groove is close to the board.
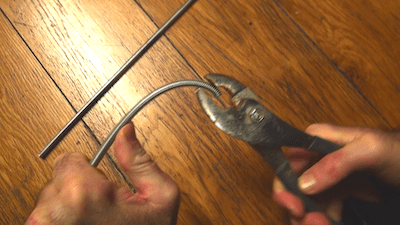
15.) Cut a piece of the thinner 38 gauge ni-chrome wire about 23 cm (9”) long. Twist the ends onto rubber bands at least 5 turns so it does not come off.
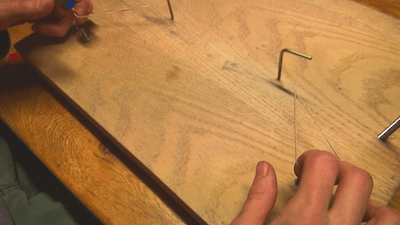 The ni-chrome wire will bend around the bronze Ls at about a 45 degree angle, and rubber bands will hook onto woodscrews. Hold the wire this way with the rubber bands stretched a medium about and try to guess where the screws should go. If it’s not the right amount of tension you can put the wood screws in a different position. Half of the maximum stretch of the rubber bands is good. If your wire keeps breaking, try less tension.
16.) Push the wire into the L grooves. Notice that when you rotate the L, it lowers or raises the wire very precisely.
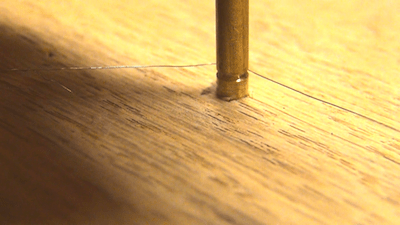 Calibrate the wire level so it cuts slices that are the same thickness on both sides. Do this by screwing in the bronze L in until the ni-chrome wire just barely touches the board (that’s why you used your fingernail to scratch off the wood fibers when you drilled the hole); on both sides. Then screw the Ls out (counter-clockwise, so the wire is no longer resting on the board) exactly one turn. In the future, when you adjust the cut thicker (counter-clockwise) or thinner (clockwise), turn both sides the same amount.
Fine-Cut Sheets
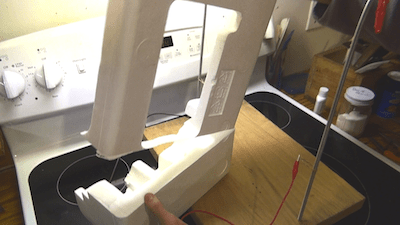
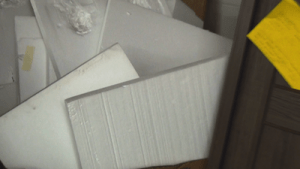
17.) I’m going to start out with the worst EPS—molded packaging foam. It’s usually hard so it cuts slowly; and it’s heavy, as foams go. It looks like you could get some good flat sheets from it, but there are so many voids that you won’t get much. Yet, as bad as this stuff is, it’s easy-to-find and it’s still many times better than the best paper.
I hook up the alligator clips to the Ls and try cutting a slice. The first one or two cuts are never good so don’t get discouraged. Push the foam forward gently so as not to deflect the wire a whole lot. This heavy foam is a little wavy, but it will work.
18.) Here I’m going to try a lighter (lower-density) foam. Notice how it cuts faster. But it’s cutting a little too thin now, so let’s turn out both bronze Ls one quarter turn out. With lightweight foams I raise the wire a little. Perfect!
You decide what thickness to make foam. Too thick is too heavy. Too thin isn’t strong enough. A good slice has some flex, but not too much. The screw threads in the “L”s advance 1/32” (about .8mm) in each turn. That means that each time you twist the Ls 45 degrees, you lift or lower the wire by 1/10th of a millimeter.
However, if you have raised the wire .8 mm above the board, that does not mean that you will make sheets that thick .8mm thick. Some foam will be melted away (the “kerf”). How much is melted away depends on how dense the foam is; how hot the wire is; and how fast the foam travels. I find that the ni-chrome wire makes a wider kerf in lighter foams. So that means I have to turn out the Ls a little more—making the wire higher—to get the same thickness of light foam compared to heavier foam. All of this will become intuitive as you cut foam.
Measure Thickness
19.) You might not need to know a numeric measure, depending instead on getting a feel for how stiff it should be.
 You can’t measure the thickness of a sheet of with a ruler. A dial gage is expensive, about $100 U.S. If you do get one, make sure that the part that touches the foam is wide, or it will crush the foam. That would give you an inaccurate measurement.
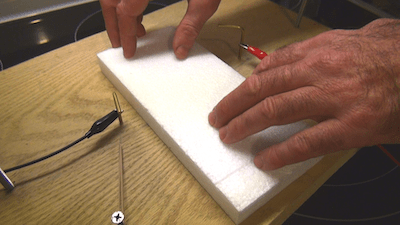
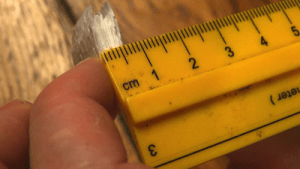
A workaround for an expensive piece of equipment is to cut 10 squares and stack them together. If 10 sheets measure 6 millimeters, then 1 sheet is 1/10th of that: .6 or 6/10 of a millimeter.
.6 mm (6/10 mm) is a good thickness to start with. If it’s too rigid and heavy, go thinner. If it’s to flimsy, go thicker.
Finding Foam
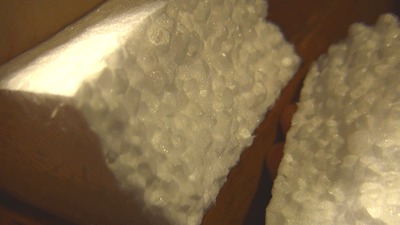
 Lets step back a moment and disambiguate the common polystyrene foams. The foams made from the spherical beads are EPS - expandable polystyrene. Sometimes it is called "bead board". It is used in a lot of cushion packaging (for appliances, computers, etc.), in many hot drink cups and in thermal insulation, usually all white. It is closed cell foam. Egg cartons, meat trays, clam shell food service, some cups (with a seam down the side), and some insulation (e.g. blue and pink board at Lowes or Home Depot) are XPS - extruded polystyrene foam. It is also closed cell foam. I think that "Depron"--a common material for making model airplanes--is also extruded polystyrene.
The egg cartons, meat trays, and clam shells are first extruded into large foam sheets. Subsequently, these sheets are thermoformed into the final end-use articles. The extruded foam cups are typically two
pieces - with the side (with a seam) and the bottom being separate pieces.
I've given the strict definitions. People are sloppy on web sites and in their advertising and incorrectly use EPS, XPS, and Styrofoam names. Some people even call polystyrene "styrene" which is completely wrong. That doesn't even get into the spongy, open cell foams like polyurethane, which is used for seat cushions; and sprayed foams. There is also some kind of paper-like foam used to wrap delicate parts for shipping. Everyone thinks it will make great walkalong gliders, but is not rigid enough.
20.) Expanded polystyrene foam (EPS) foam all seemed about the same to me at first, but with experience I become aware of the diversity: heavier stuff, lighter, big beads and smaller beads. Any EPS foam will work far better than paper, but some foams are clearly better for gliders than others.
I’ve already mentioned why I don’t use molded packaging foam (heavy, slow-cutting, full of voids) anymore, but it will work in a pinch.
21.) For a long time I used discarded shipping boxes from the seafood department of grocery stores. However, these boxes are made to be strong and impermeable, so the foam is heavy and slow-cutting. Still, it was the first recycled foam that I could that would give me nice flat sheets without a lot of waste. If you don’t mind gliders that fly a bit fast, seafood packages work well. If you stick your nose up to the gliders, you get a slight whiff of the ocean!
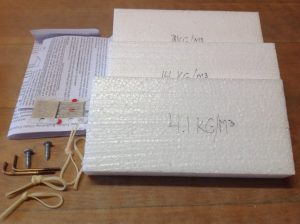
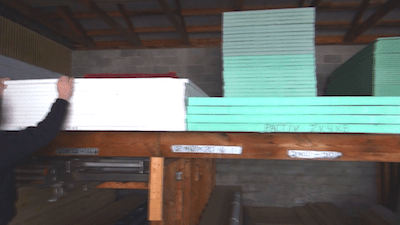
22.) Eventually I discovered the discarded packaging foam from a furniture and appliance store. There were big pieces and then I stumbled on some foam from China that was much lighter than anything I’d seen before! At 6 to 7 kilograms per cubic meter density, it’s only 4 times more dense than air. I call it Time Warp Asia foam. When you are that close to floating, the aeronautics become different—in a good way. Glider flight is astonishingly slow and easier to adjust.
 There is some foam from China that is even lower-density: between 4 and 5 kg/M3. However it has large beads (spheres) and—correspondingly—large gaps in between. The gaps do not seem to hurt the gliders. Indeed, they fly very well, but having big holes in the gliders puts some people off.
By comparison, the lowest density foam that is manufactured in North America is heavier: 11kg/M3. However is a bit less prone to ripping.
Time Warp Asia (I now call Ultra Time Warp) foam is very small part of the waste stream, but if you can make connections with a conscientious furniture/appliance place, you might find it. I get from Beiters, which has several stores in central Pennsylvania. Rob Beiter is a very conscientious person who goes out of his way to support community projects and he diverts the ultra-lightweight foam to us. I don’t know if you will be lucky enough to find someone like that but it’s worth a try. Perhaps taking some gliders in and showing what you’re doing would help.
23.) In my experience, only the bead foams work well for beginners. People do make gliders out of disposable foam plates, egg cartons, meat and produce trays (also extruded polystyrene XPS) but—as is also true of extruded blue and pink building insulation--that foam is heavy even when sliced thin. The resulting flight is fast, which is difficult for beginners to learn with. However, the heavier gliders are more durable and are better at flying outside, when there is a slight breeze. If you don’t mind trotting to keep up with it, try it. Tyler MacCready’s design used Depron-like foam.
Phil Rossoni shows how to use already thin foam to make a walkalong.
Measure Density
24.) Knowing the density of foam is the most important thing, in my opinion. I can pick up foam, feel the weight, feel the softness or hardness (lower density foams are softer—not spongy, but noticeably softer). From handling it I can make a guess of the density. But even after years of working with foam, some of my guesses are off sometimes, so I never fail to measure density the proper way and figure out the number.
To calculate density, you weigh the foam block and measure the width, length and height; dividing the former by the latter. W x L x H / Wt
In North America, foam is measured in pounds per cubic foot, but it’s easier to just figure it out with metric measurements and convert it if you have to. It’s usually expressed in kilograms per cubic meter (kg/M3). So when you are calculating, enter 6 grams as .006 of a kilogram. 22 cm is .22 of a meter; 95 mm is .095 of a meter, etc.
To give you an idea of ranges, in North America ¾ lb/ft (=12 kg/M3) density is light (one or two N.A. companies make it as low as .7 lb. density); 1 ½ lb/ft3 (=24 kg/M3) density is heavy; one pound density foam (16kg/M3) is average. But if you are fortunate to find foam from China (Time Warp Asia) you can find density of 6 or 7 kg/M3. Light foam cuts faster and easier as well as flying more efficiently and slowly. I send a sample of Time Warp Asia with the foam cutting kits so people know what it is.
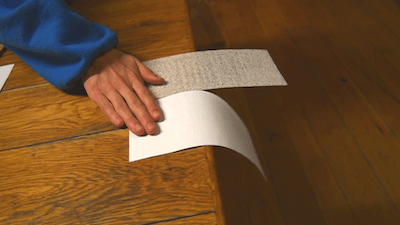
 Once you have thin sheets of foam, anybody can cut and fold them into walkalong gliders. So you can practice a kind of aeronautical alchemy; transforming scraps of packaging foam into gossamer flyers that soar like birds.
There are many more videos and text pages in this series about walkalong gliders: How to fly them; how to make the small and big gliders; how to mass-produce gliders; how to repair gliders; and how to go about designing your own gliders.
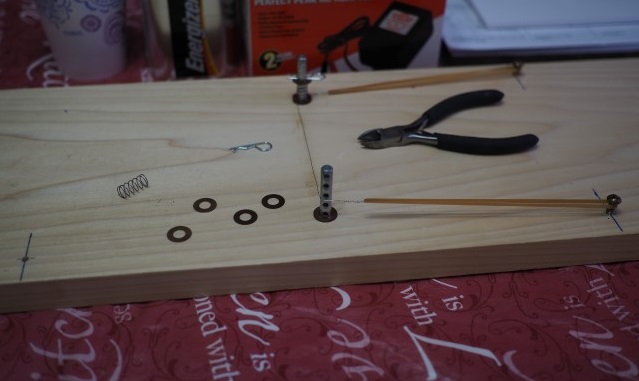
Jim Annweton's Design: I got some really interesting DIY cutter feedback from Jim Annerton of Huntsville, Alabama. Years ago I started adjusting the distance between the board and the hotwire with shims--and I hated them. They would slip and compress and generally cause problems, so I was happy to leave them when I discovered that I could use screw threads instead of shims. But Jim's design avoides the problems I had with shims by piling up very thin brass washers (some as thin a 0.005") which are skewered on upright clevis pins. So unlike my shims that would slip and slide, Jim's stay put. Then, a compression spring is also skewered on the clevis pin and is held under compression with a cotter pin at the top. So the wire always stays at the right level.
Jim's design might not be for everyone. Jim had the stuff around his shop, but if you have to buy the special brass washers (though knifemakers suppliers), then you could be getting into some money. But it's a brilliant design and it solved the issues I had with shims. Jim reports that when he flew his gliders, "My two granddaughters (aged 7 and 4) loved to watch and try them. The first words out of their mouth when they saw them was, "How are you doing that?" :)" And Jim is already scrounging for foam at his local furniture store and experimenting with Asian foam.